Monday 18 December 2006

va·nil·la in·fused lem·on·ade syr·up

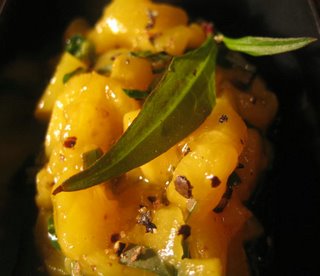
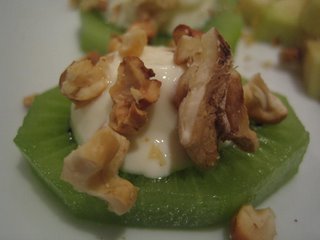
It was such a lovely surprise! I got home from work last thursday, checked the mail on the way in and found a jar of Jules's famous vanilla bean infused lemonade syrup in the letterbox.

Isn't it beautiful?! So golden and decadent. And so very lovely diluted with some sparkling water on a lovely summer day.

Thanks so much Jules for the fantastic surprise! I hope you share the recipe with us all ; there are people who want to know!

Monday 11 December 2006

men·u for hope III

Menu for Hope III is raising funds to support the UN World Food Programme, which provides hunger relief for needy people worldwide. Most of us writing and reading Food Blogs are able to treat food and cooking as a joyful and happy experience ; not everyone has this privilege. For many in this world, food is not guaranteed and is a matter of survival. Menu for Hope is an annual event, last year raising US$17,000 for UNICEF.

Supporting Menu for Hope is a small way for you to help those less fortunate.

I am proud to offer a $100 gift voucher to Truffle, Wellington, New Zealand, very generously donated by John and his team, to tempt you, and encourage you, to support Menu for Hope :

Truffle are specialists in fine European food and wine with both physical and online shops. Truffle are New Zealand agents for many exclusive and otherwise hard to find imported gourmet foods, carrying over 600 different product lines. A voucher for Truffle is a fabulous gift for yourself or for someone you love, care about or simply want to impress. A visit to Truffle will open an unbelievable world of gourmet rice, salt, wine, cheese, chocolate, truffles, saffron, vinegar, oils, jam, pâté, paprika, tuna, verjuice, capers, flour, nougat . . .

Raffle tickets are purchased online at First Giving, an online fund raising company. All ticket monies are collected by First Giving on behalf of Menu For Hope. Each prize has a unique number which should be included in the 'Personal Message' section at the First Giving site when you purchase your tickets and make your donation.

The code for this fabulous Truffle voucher is AP07, be sure to include this in the 'Personal Message' section as you donate at First Giving. Each ticket in the raffle is $10 - quite a bargin for a $NZ100 voucher - so buy a few!

There are many fantastic prizes offered by Food Bloggers for Menu for Hope III, details for which can be found on these Blogs :

Chez Pim - The full round-up of prizes worldwide.
Grab Your Fork -Asia Pacific/Australia/New Zealand.
Davidlebovitz.com - Europe and UK.
The Cooking Diva - Latin America.
Cardamom Addict - Canada.
Becks and Posh - US West Coast.
The Amateur Gourmet - US East Coast.
Kalyn's Kitchen - US (the rest).

Details for this prize :
Prize : $100 voucher for Truffle
Prize Code : AP07

How to purchase a ticket to support Menu for Hope III :

1. Go to the donation page at First Giving (http://www.firstgiving.com/menuforhopeIII)

2. Make a donation, each $US10 will give you one raffle ticket toward a prize of your choice. Please specify which prize or prizes you'd like in the 'Personal Message' section in the donation form when confirming your donation. Do tell us how many tickets per prize, and please use the prize code -for example, a donation of $50 can be 3 tickets for AP07 and 2 for AP14.

3. For US donors, if your company has agreed to match your charity donation, please remember to check the box and fill in the information so we may claim the corporate match.

4. Please also check the box to allow us to see your email address so that we could contact you in case you win. Your email address will not be shared with anyone.

5. Check back on Chez Pim on January 15 when we announce the results of the raffle. (The drawing will be done electronically. Our friend the code wizard Derrick at Obsession with Food is responsible for the wicked application that will do the job.)

Thursday 7 December 2006

buck·wheat and corn tor·til·la

I love making tortillas. So what must naturally follow from a successful recipe? A bit of fiddling to see what else you can do! Well, what I tried as a variation on the flour tortilla was to substitute some of the plain flour for a different sort. In this case a buckwheat and corn polenta that I found at truffle.
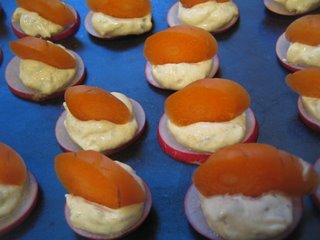
Buckwheat polenta is also known as "Polenta Nera" (Black Polenta), which really isn't so black just a light golden grey with a few flecks of black to give it some detail, so to speak. I am dying to make a soft polenta dish with this but at the rate I am making tortillas I might have to buy another packet reserved especially for polenta!

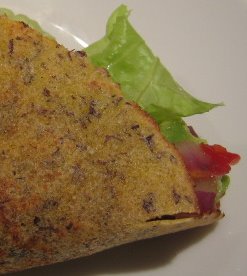
Once again I made these using a chappati press but rolling would be just as good, but my dough was fairly soft so it would be trickier. I also found that these tortilla were crispier and more brittle than the flour only ones, as you can see from the photo. I think they would make great tacos maybe baked in the oven hanging on the bars of the shelf to form a truely crisp taco. As it was they became taco, less by design, more by accident - but they sure tasted good!

Buckwheat and Corn Tortilla
makes about 12

1/2 cup buckwheat and corn polenta
1/2 cup unbleached stoneground flour
1/2 tsp salt
1 tablespoons lard or goose or duck fat
boiling water, about a 1/2 cup

Mix the flour and the salt together then rub in the fat. While stirring with a wooden spoon, add enough boiling water to form a dough then knead briefly. This dough will be quite soft, but the polenta will absorb some while it rests so err on the side of wetness.
Wrap in plasitc and rest for an hour. Heat a cast iron frying pan to hot.
Divide into 12 pieces and either using a tortilla/chappati press or a rolling pin form circles as thin as you can, cooking them for 30 seconds per side, or until then have golden patches and are puffy, then wrapping in a teatowel to keep warm and soft.

Sunday 3 December 2006

Christ·mas has come ear·ly


Christmas has come early in my house thanks to the very generous Paul!

A bottle of Camshorn Pinot Gris from Waipara, Braeburn apple juice, 2 beetroot that Paul grew himself, some rosemary from his garden, cold smoked Akaroa salmon, ciabatta from Rachel Scott in Amberly, Talbot Forest Castle Rock cheese from Geraldine, Verona Salami made by Peter Timbs, Italian artisinal orzo, Valrona Caraibe chocolate.

As you might imagine lunch yesterday included the ciabatta, salami and cheese and chocolate. All of which were very special and delicious. I think I can buy the cheese up here, so it will be appearing again! We are going to have the smoked salmon today and the wine this evening. The apple juice was the perfect thing to have when we got up this morning - you can really taste the braeburn apples. The orzo will be ripped open tomorrow night for a special pasta. The beetroot and rosemary are such a special inclusion ; the beetroot will be roasted and served in a salad at lunchtime, and the rosemary will flavour some roast potatoes this evening.

Thanks Paul, I love it!

Parcels will be arriving around the country as we speak, and a round up will be featured here soon!

Monday 27 November 2006

mince·meat

. . . and another new tradition for me . . . mincemeat!

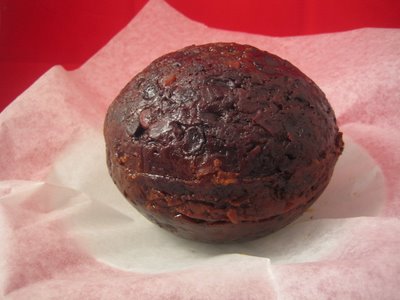
Two kinds - one with meat, real meaty meat and one without, like we know it now-a-days. Looking at the picture above, the one with minced beef is on the right, I was surprised how light coloured it is, especially in comparison with the very dark non-meat mixture on the left. I am yet to find out how either tastes ; but I am dying to know if I can tell the difference and if the real-meat mincemeat is less sweet and sickly as Hugh promises. I will let you know! But if the meat mincemeat pies are not to our taste the mixture apparently make a wonderful stuffing for pork. Either way I win!

I haven't made very much because I only wanted a little, so multiply to your requirements.

Sterilise some jars before making these mincemeats by preheating the oven to 120°C and heating some clean jars and their lids for an hour. Once the jars are filled they will keep a while but can be used after a week or so. Turn the jars the other way up every so often to allow the liquid to permeate.

Real meat mincemeat
from The River Cottage Year by Hugh Fearnley-Whittingstall, with a few changes
makes 550mL

125g finely minced good beef
60g beef suet, grated
60g each of currants and raisins
1 apple, peeled, cored and chopped
50g dark muscovado sugar
35g ground almonds
25g preserved ginger in syrup, chopped, plus 1T of the syrup
25g mixed peel
grated zest and juice of a lemon
1/4 teaspoon freshly grated nutmeg
1/2 teaspoon mixed spice
60mL Cognac

Mix everything together thoroughly and store in the
sterilised jars for a week or so before using to make mince pies (or to stuff pork!).

Mincemeat
from Tamasin's Kitchen Bible by Tamasin Day-Lewis
, with a few changes
makes 600mL


110g each of sultanas, raisins and currants
60g of blanched almonds, chopped
1 apple, cored and chopped
135g dark muscavado sugar
65g mixed peel
grated zest and juice of an Orange
1/3 t freshly grated nutmeg
cloves, cinnamon and mace, ground to make 1/2t total
1/2t freshly grated ginger
55g beef suet, grated
1T dark rum
50mL Cognac

Mix everything together thoroughly and store in the sterilised jars for a week or so before using to make mince pies.

Check Morsels and Musings for other Festive Food Fair fare.

Sunday 26 November 2006

Christ·mas pud·ding

Today is what we could call Stir-up Sunday and is the time to make the Christmas pudding, mincemeat and Christmas cake. This is the first year that I have done this, but since I have been meaning to for years, and now that I have broken through the barrier that was stopping me before, a new tradition [for me] has been born!

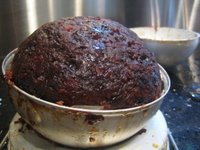
My Mother-in-law gave me a brilliant spherical mold a couple of years ago, and it is the perfect shape for a Christmas pudding. It has made many a ball shaped birthday cake, a spherical haggis and the foundation for a skull Pavlova one Halloween - a spherical mold is a vital piece of kitchen equipment - but this Christmas pudding has been its crowing product!

I used Tamasin Day-Lewis's recipe for Extravagant Christmas Pudding from her book Tamasin's Kitchen Bible. This is my favourite kitchen handbook and I can't recommend it highly enough. I added some dried cranberries, because I had them and they seemed to be the right thing to add, and adjusted some of the ingredients to suit what I had. I also ended up cooking two puddings because I had so much mixture, I did intend only to make one, but they keep and for a lot of people on Christmas day you might just need two. I actually had enough to make five individual ones in ramekins too . . . !

Extravagant Christmas Pudding
made 2 1L puddings

130g plain flour
cinnamon bark, mace, cloves and
allspice, ground to make 3 teaspoons all together
1T grated ginger
130g each of sultanas, raisins, currants
75g dried cranberries
150g each of prunes, dried apricots and dates, chopped
300g dark muscavado sugar
75g each of Brazil nuts and almonds, chopped
130g brown breadcrumbs
2 apples, cored and grated
1 carrot, peeled and grated
110g beef suet, minced or chopped
4 eggs
200mL Guinness or another stout
50mL Cognac
juice and grated zest of an orange

Grease the mold or basin.
Sift the flour into a very large bowl then add the rest of the ingredients in the order given, and mix thoroughly. Add a little milk if necessary to make a soft batter. Fill the mold or basin to three quarters full and cover, with the lid or with a piece of greaseproof paper and foil that you had pleated together in the middle to allow room or expansion. Tie a piece of kitchen string securely around the basin making a handle as you do so. Place in a large pot, with a deep steamer insert if you have one or a trivet or a folded piece of foil to lift the pudding from the bottom. Add boiling water to come halfway up the sides of the pudding and simmer for 7 hours, topping up with water if necessary.
Remove from the pan and take off the lid. Leave to cool then unmold and rewrap with greaseproof paper and foil and leave in an airy place until the day.
Resteam for 3 hours to serve.

Check Morsels and Musings for other Festive Food Fair fare.

Friday 24 November 2006

fen·nel and pea ri·sot·to

I felt like making a spring time risotto for Hay Hay Its Donna Day #8 hosted this round by Cenzina. Two vegetables that positively squeal spring to me are fennel and fresh peas bought in their pod, so what else could I do but make a fennel and pea risotto!

I am fairly new to risotto having been put off at a young age by bad gloopy porridge like stuff and instant rice risotto (remember that?!), but I am well and truly a convert now. I bought some wonderful Carnaroli rice not so long ago and the frequency of risotto making in the house has certainly increased. I highly recommend trying the different types ; Carnaroli makes a drier risotto and Vialone Nano rice makes a creamier, starchier, risotto and also makes a great rice pudding. The Arborio rice I used to buy from the supermarket was fine, but without any characteristics to make it different from any other short grain rice. Perhaps I need to search out a better brand of Arborio . . .

Fennel and Pea Risotto
serves 3 (or 2 for dinner and 1 with leftovers for lunch)

1L
Chicken stock
A generous handful of peas in their pods, washed
1 small onion, finely chopped
1 bulb of fennel, washed, fronds reserved, finely sliced
olive oil
butter
200g Carnaroli rice

50mL white wine or vermouth
dash of Pernod
30g finely grated Parmesan cheese

Put the stock in a pot and bring to the simmer adding the trimmings from the fennel, but not the fronds. Pod the peas, putting the pods in the sock and reserving the peas.

Heat a large heavy pan with a knob of butter and some olive oil. When the butter has melted and the pan is hot add the onion and fennel and sauté until soft and starting to turn golden. Add the rice and turn in the onion and fennel until nicely coated with the butter and oil.
Add the wine or vermouth and the Pernod and stir until the liquid is all but absorbed. Add the stock a ladleful at a time, stirring well all the time making sure each addition is absorbed, but not completely dry, before adding the next until all the stock has been used, or you judge the wetness is just right and the rice is cooked with a lovely creamy texture. Avoid adding the pea pods and fennel trimmings, perhaps straining the last amounts through a sieve.

Stir the peas through the risotto so they are warmed through but still retain their fresh crunch.
Turn off the heat and stir in the Parmesan and a bit more butter if you like.
Serve sprinkled with the reserved fennel fronds.

Check Cavoletto di Bruxelles for other wonderful risotto recipes that have been put together for Hay Hay Its Donna Day #8!

Friday 17 November 2006

beetroot and brazil nut relish

Beetroot is a guaranteed way to add a bit of pink to a meal, shocking though it is! Beetroot can be happily included in many meals, contributing not just colour but also sweetness and vitamin C and antioxidents among other benefits.

I think the best way to cook a beetroot is to wash gently, taking care not to damage the skin, trimming only the leaves, then wrap loosely in foil and roast for an hour or two. Sometimes I add some salt, pepper and olive oil, but only if they are within reach. After cooling enough to handle the skin comes away easily and then the purple globe is ready to be introduced to many a recipe. A newly found favourite of mine is :

beetroot and brazil nut relish
flexible ingredients, flexible quantities, flexible servings

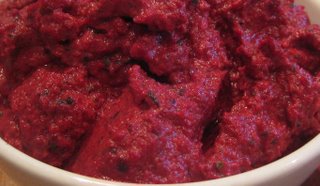
Purée the roasted beetroot with some garlic. Add some brazil nuts ; the more nuts the thicker and more substantial the relish will be. Season with redwine vinegar, salt and pepper. Leave for a few hours for the flavours to develop. Serve with bread and cheese, roasted meats, felafels and pita, anywhere some bright pink relish would be welcome.

Thursday 16 November 2006

mace

Mace is the lace like placenta that surrounds the nutmeg within the fruit. The lines and wrinkles on a nutmeg show where the mace was lying against the nut. Although indigenous to Indonesia, mace is now found in most spice growing areas. Both mace and nutmeg have the botanical name of Myristica fragrens, indicating the fragrant value of the volatile oils they contain. These oils are narcotic and poisonous in large quantities!

Mace may be bought as ground or whole blade mace, and more rarely, complete with the nutmeg it encloses. Unsurprisingly the flavour of mace is similar, but more pungent than that of nutmeg. The flavour of mace could also be described as slightly finer and fresher than nutmeg and is used in savoury dishes more than sweet.

Ways to use mace :

  • Ground and added to a spice mix for a cake.
  • Included in garam masala, or curry powder.
  • A whole blade included with peppercorns and a bay leaf to infuse milk for a white sauce.
  • Added to a poaching court-bullion for fish or seafood.
  • Include in the pickling liquor for onions or gherkins.

Wednesday 15 November 2006

New Zea·land blog·ging by post re·mind·er

Just a quick reminder! Everyone who has emailed me to join in with New Zealand Blogging by Post should now have received an email with the details of the lucky recipient of their parcel. If you did want to join in and have not received an email, please let me know as soon as possible.

Thursday 9 November 2006

gold·en ras el han·out

There is a food and wine shop here in Wellington that I absolutely love to visit : Truffle. And luckily for those of you not in Wellington and unable to visit in person they now have a website complete with an online shop.

One of my favourite purchases of late has been a jar of Golden Ras el Hanout, a fabulous spice mix, which translates as 'House Blend'. This particular mix is listed as turmeric, chili powder, coriander seeds, cumin seeds and ground ginger. The label mentions that ras el hanout may contain rose buds and Spanish fly. Apparently it is the Spanish fly that makes this version golden, and apparently Spanish fly is not something you would list on the ingredients even if it did contain it - very exciting!

We have used a spoonful or two of Ras el Hanout in many a dish including a chicken and cauliflower stew and kitcheri, and rubbed it on several pieces of otherwise unadorned meat.

The lamb back strap in the photo above was rubbed with the Golden Ras el Hanout and roasted in the oven at 180°C for 12 minutes. We served it on some steamed silverbeet with roasted yams : a lovely, simple, delicious and interesting meal.

Truffle Food & Wine
1/22 Garrett Street
PO Box 11-770
Wellington 6011
New Zealand
Ph +64 4 385-2802
Fax +64 4 385-2801
truffle@xtra.co.nz
http://www.truffle.net.nz/

Monday 6 November 2006

flour tor·til·la

First of all, I would like to say, that the best way to cook these tortillas is with someone else. Someone with whom you can enjoy a glass of wine in the kitchen, working together while you chat. Then, they will be perfect.

Flour Tortilla
makes 12

2 cups strong bread flour
1 tsp salt
2 tablespoons lard or goose or duck fat
boiling water, about a cup

Mix the flour and the salt together then rub in the fat. While stirring with a wooden spoon, add enough boiling water to form a dough then knead briefly. Wrap in plasitc and rest for an hour. Heat a cast iron frying pan to hot.
Divide into 12 pieces and either using a tortilla/chappati press or a rolling pin form circles as thin as you can, cooking them for 30 seconds per side, or until then have golden patches and are puffy, then wrapping in a teatowel to keep warm and soft. This is where a kitchen partnership is so good ; one person rolls and the other cooks, all easy, no fussing (and no forgetting to turn that one which is now burning because you were busy rolling).

Thursday 26 October 2006

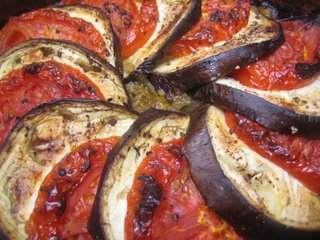
au·ber·gine and to·ma·to gra·tin

A vegetable dish for when you feel like ratatouille but it is too early in the season for all the ingredients to be plentiful in the shop so you only buy an aubergine and a couple of tomatoes because you just can't resist even though it is a bit early.

I saw the idea for this in the Alice Walters book Chez Panisse Vegetables. It is a great way to serve aubergines and tomatoes, with their flavour bolstered by onion sautéed with herbs. The gratin is baked in the oven making it so easy to cook along side a roast chicken.

Aubergine and Tomato Gratin
serves 4, or as many as you like according to the dish and quantity of vegetables

1 onion, chopped
3 cloves garlic, minced
a dash and a drizzle of olive oil
robust herbs - thyme and bay for example
salt and pepper
1 eggplant, sliced
2 large tomatoes, sliced

Sauté the onion, garlic and herbs in the olive oil over a medium heat until soft and beginning to caramelize. Spread over the base of a suitably sized oven proof shallow gratin dish. Put a slice of tomato on top of each slice of aubergine and arrange nicely. If you have extra tomato or aubergine hide it under the matching slices or use it for another dish to leave the top layer looking nice. Prinkle with salt and pepper and a bit more olive oil. Cover with foil and bake at 200°C for 30 minutes then uncover and cook for another 15 minutes or until it is soft and cooked and begining to turn golden on top, there should not be any watery juices left.

Tuesday 24 October 2006

DMBLGIT : the judg·es

I have great pleasure in announcing the judges for the October edition of Does My Blog Look Good In This are :
  • Bron of Bron Marshall, photographer extrordinaire and DMBLGIT winner.
  • Bea of La tartine gourmande, very talented photographer and DMBLGIT winner.
  • Michael Owen, advertising and commercial London based photographer.
The winners will be announced right here on The Laughing Gastronome at the end of the month.

Entries can be found here - have a look and judge for yourself!

Monday 23 October 2006

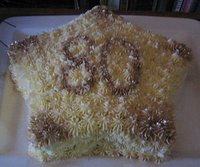
left·o·ver ic·ing bis·cuits

I made my friend's father's 80th birthday cake a couple of weekends ago (Happy Birthday Joe!), and if you have had the honor to make a birthday cake for someone using bu

DMBLGIT re·mind·er

Remember entries for the October edition of DMBLGIT close tomorrow, 24th October!

Monday 16 October 2006

World Bread Day

is World Bread Day, organised as a blog event by Kochtopf.

Now, I love making bread, strangely enough possibly more than eating it, so it was hard to choose what sort of bread to choose for this event. So I didn't choose. I just decided to show a few different types of bread that I, and G, make, and to give a basic recipe for the most simple of breads.

The picture above shows clockwise from top left : challah, pain à l'ancienne, bagels, ciabatta, pita, buckwheat soda bread, crispbread and soft white.

Some of these breads have recipes on this site already and some are on the way! And there are many more breads that are not pictured - naan, English muffins, crumpets, lavash, and sourdough.

Simple Bread
makes one loaf

450g strong bread flour
1 teaspoon of yeast
1/2 teaspoon of salt
1 cup tepid water

Mix the yeast and salt into the flour. Add enough water to hydrate all the flour, you might need more or less. Knead
for about 10 minutes to form a smooth and elastic dough, adding more flour or water as necessary. Put in an oiled bowl and cover with plastic wrap and leave in a warm place for about two hours or until doubled in size. Punch down (literally) and form into a loaf shape, you can use a tin or go free form. Cover with plastic and leave to rise again in a warm place for about 30 minutes while you preheat the oven to 220°C. Slash the top of the loaf to prevent bubbles under the crust and bake for about half an hour or until the loaf sounds hollow when rapped on the bottom. Leave to cool for at least 30 minutes to complete the cooking before slicing.

And the best thing to have with bread? Butter of course!

Sunday 15 October 2006

chees·y feet scones

If it is a Sunday afternoon and you just feel like something nice to eat and you are feeling a bit amused - try these . . .

Cheesy Feet Scones
makes enough for afternoon tea for four people with a few left over to take to work during the week . . .

225g plain cake flour
pinch of salt
40g unsalted butter
1 teaspoon baking soda
1 teaspoon cream of tartar
150mL buttermilk
75g grated strong cheddar cheese

Preheat the oven to 220°C.
Rub the butter into the flour then mix in the salt, baking soda and cream of tartar. Lightly mix in the buttermilk, then almost all the cheese. Knead briefly until the dough is smooth. Roll out to 2cm thick and cut out foot shapes with a floured cutter and set on a lined baking sheet and sprinkle with the rest of the cheese. Leave for 10 minutes then bake for 10 minutes. Leave to cool while you make some tea, open some wine or just hang around a bit. Eat warm spread with some lovely fresh butter and enjoy the last bit of the weekend.

Sunday 8 October 2006

ov·en roast·ed as·par·a·gus

I am so pleased the asparagus season has begun! And the easiest way to cook some asparagus to go with the roast chicken you are having for dinner is to wrap the wet-from-washing spears, sprinkled with a little salt and pepper, in foil and pop in the oven for about 5 minutes. Lovely! No boiling, steaming, heating an element or washing up, just using what you already have going.

Saturday 7 October 2006

sour·dough but·ter·milk pan·cakes


I am lucky enough to have been given some of a wonderfully active sourdough starter by a friend. This is seriously active stuff. I had a starter a few years ago, but the resulting bread was fairly solid, so I didn't use it that often ; the weekly feedings seemed such a waste that we weren't that upset to loose it after one holiday. The bread made with this new starter is as good as bread made with commercial yeast. Although I must say that I hope my bread making techniques have improved in that time too!
This morning I thought I'd try out sourdough pancakes and since I had some buttermilk in the fridge from making butter last weekend I made sourdough buttermilk pancakes.
I figured that sourdough and buttermilk together would result in quite a tangy pancake that would go brilliantly in a stack with some wonderful, salty bacon and sweet maple syrup. Happily they did just that, a brilliant stack of breakfast!
sourdough buttermilk pancakes
to serve two

1 cup of sourdough starter, best if fed the night before so it is good and lively.
2 tablespoons of buttermilk
1 tablespoon of olive oil
1 egg
2 teaspoons of sugar
large pinch of salt
1/2 teaspoon of baking soda
1 tablespoon of water
olive oil for greasing the pan

Mix the starter, buttermilk, olive oil, egg, sugar and salt until well combined, but not too much so you don't develop the gluten and end up with a tough pancake - no one wants a tough pancake!
Heat a pan to medium and an oven to low with a foil covered plate in it to keep the pancakes warm. Pour a little olive oil in the pan and then wipe around and off with a paper towel. Use this now oiled paper towel to wipe the pan between pancakes.
When you are ready to cook the pancakes mix the baking soda with the water and then mix into the batter. Leave for one minute to active the baking soda. Since the batter is acidic the baking soda quickly and powerfully releases its carbon dioxide. Pour some batter into the pan and cook until golden on each side, then transfer to the oven. I used about 1/3 of a cup of batter for each pancake.
Serve in a stack with crispy bacon, maple syrup and, if you are me, a grinding of black pepper over the top. What a great breakfast!

More information on sourdough can be found here.

Thursday 5 October 2006

Sunday 1 October 2006

Does My Blog Look Good In This 2006 #10 Oc·to·ber

I am very pleased to host the October round of Does my blog look good in this?, the food photography challenge originally devised by Ronald of LoveSicily, which he describes as :

The idea behind the event/contest is to give everyone a chance to enjoy some of the best pictures of the month posted on food blogs. There are so many food blogs now and stories are constantly posted that it's very easy to miss some great posts and pictures. This event takes us back through the food photos.

How to participate :
  1. Choose the very best, the most beautiful, your favourite photograph of food or drink that you took and posted to your food blog in September.
  2. Email your chosen photo as an attachment to dmblgit200610@gmail.com with DMBLGIT in the subject, and the following information in the body of the email :
    • your name
    • location
    • blog address
    • the title of the photo
    • the URL of the relevant post
    • the type of camera you used
  3. Entries close on the 24th October 2006.
A panel of judges will rate all the entries for eatability, originality and aesthetics and the winners will be announced right here on The Laughing Gastronome at the end of October.

Good luck and I can't wait to see your entries!

Previous rounds : September (results coming soon!), August, July, June, May, April, March, February, January.

The small print :
  • The photo must have been taken by you.
  • The photo must have been posted on your blog during September 2006.
  • The photo must be food/drink related.
  • Only one entry per person.
  • The judges may not enter.

Friday 29 September 2006

ri·sot·to Mil·an·ese

My favourite risotto! I love the colour and I love the simplicity and I love the taste. Saffron is a wonder food to me, and the inclusion of it in this risotto was bound to win me over. And, just to name name drop a wee bit, the first time I had this was in Milan. Romantacising or not, who could argue that the setting could not be better. Actually that whole evening was wonderful, despite that we had arrived from Scotland via Heathrow without our bags, and as you might imagine, Milan is not the best place to feel shabby. One bag turned up the next day, the evening of which we found a fabulous neighbourhood restaurant, with all the atmosphere one could wish for ; the electricity went out whenever the coffee machine was used, the waiters were amazing and the food divine. No wonder the risotto Milanese formed such a great impression.

In my version I use marrow ; it adds such a wonderful unctuousness. If I am serving this with osso bucco then I will push the marrow from the bones before cooking and use it in the risotto.

Risotto Milanese
to serve four

350g rice suitable for risotto such as arborio, carnaroli, vialone or nano
a large pinch of saffron
1.5L chicken stock
200mL white wine
6 tablespoons of butter, substituting up to half the volume with marrow
1 large onion, finely chopped
2 cloves of garlic, crushed
50g Parmesan, grated

Bring the stock to a gentle simmer and add the saffron.
Melt the butter and marrow in a large frying pan or shallow saucepan over a medium heat and saute the onion and garlic until soft. Add the rice and stir well to coat the rice in the fat. Add the white wine and stir until the liquid has been absorbed. Add a ladleful of the simmering stock and again stir until the liquid has been absorbed, but the pan is not completely dry. Continue adding the stock, a ladleful at a time until is all used and the rice is al dente. You may need to supplement the stock with water, or more stock and you might not use it all.
Remove the risotto from the heat and stir in most of the Parmesan. Serve in warmed bowls, sprinkled with the remaining Parmesan.

The best way to enjoy making this is with a glass of wine and someone nice to keep you company while you stir, although, alone with the wine, it is a lovely meditative half hour.

Sunday 24 September 2006

leaf·y green

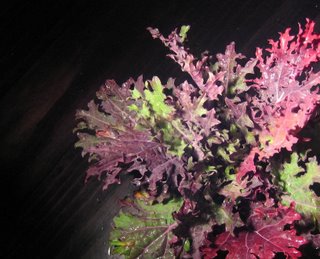
I have no idea what this leafy green vegetable is called. It is very similar to curly kale, but not as curly, and also not as green. It has the same tough leaves that do not disintegrate and let out water like spinach or silver beet, but also not as tough, but I don't think you could eat them raw. It has a tough stem to each stalk with the edible leaves attached sporadically along the length.

A bunch of this has been in our organic vegetable box for the last few weeks. Being a big fan of curly kale, I have been loving seeing the bunch of purple and green appearing in the box.

I have been cooking this vegetable like this :

Wash and strip the leaves from the stalk, tearing into bite sized pieces. Heat a wok, a when hot add a small amount of peanut oil. Add some chopped garlic and chilli, stir-fry briefly then add the leaves. Continue to stir fry until bright green and tender. Serve sprinkled with some toasted sesame oil and salt and pepper.

Makes a lovely start to a meal!

Saturday 23 September 2006

kidney bean hum·mus

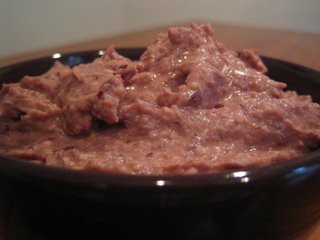
As I was spring cleaning the cupboards the other day (I do seem to do this alot!), I found two packets of kidney beans that I just had to use up - they had bean(!) there much too long. I was hunting through the cupboards looking for some chickpeas I thought were there so I could make hummus. No chickpeas, so there was nothing for it but to make kidney bean hummus. I could only imagine the pleasing pinkness that would result!

I soaked both packets overnight in cold water. Then drained and rinsed and boiled for 10 minutes to get rid of the phytohaemagglutinin, before simmering for 40 minutes or so until they were tender. I used some of the cooked beans for a kidney bean curry (wonderful - recipe to come), some went into the freezer to add to something else sometime, and the rest turned into hummus. I struggled with what to call this because hummus means chickpea - no-hummus hummus, kidney beannus, but in the interests of resisting silly names and because you know what I mean kidney bean hummus it is :

kidney bean hummus

2 cups cooked kidney beans
4 cloves of garlic
juice of a lemon
2 tablespoons of tahini
half a teaspoon of cumin
salt and pepper

Puree the beans and the garlic in a blender or with a stick blender, I don't find a food processor works very well making it grainy. Of course a pestle and mortar or a potato masher are not out of the question either! Add the remaining ingredients mixing well adding more or less as you like, and perhaps some water if it is too thick but lemony enough. Serve as you would hummus. This freezes well too.

a springtime menu

A springtime menu, for when you want to take advantage of the new season's offerings!

Entrée
Steamed spring vegetables tossed with olive oil and lemon juice, served with crusty bread.
Lightly steam a selection of cleaned and trimmed spring vegetables, perhaps baby carrots, zucchini, and leeks. Drain and toss gently and lightly with olive oil, then a wee bit of lemon juice. Serve with crusty bread to mop up the juices.

Main
Lemon and herb chicken with couscous and salad.
Slice chicken breasts horizontally to make thin escalopes then marinate in olive oil, lemon juice and chopped fresh herbs. Preheat a griddle. Prepare some couscous using chicken stock, salt and pepper, and fresh chopped herbs. Cook the chicken and serve on the couscous with a salad on the side.

Dessert
Orange biscuits.
Use your favourite recipe for orange biscuits. Don't have one? Here's a suggestion!

Wine
A new season's New Zealand Sauvignon Blanc.
A fresh New Zealand Sauvignon Blanc to accent the fresh and herbacous spring flavours, will go nicely with both the entrée and main. Serve a desert wine or some coffee with the dessert.

Wednesday 13 September 2006

Tarlant Tradition N.V

I haven't participated in a Wine Blogging Wednesday for a while, but I just had to join in with Sam's theme of Champagne! Especially since I had the terrible task of having to choose a bottle of champagne for G's birthday!

I asked at our favourite wine store Rumbles, perfectly happy to stick with the usual Verve or Bolly, but to quote Scott :

"If you want boring old Veuve or pricey Bolly that's cool, however if you haven't tried our Tarlant wines then I recommend you give them a go."

Well, if he is going to put it like that, how could I refuse!

We decided to try the Tarlant tradition, which was described as Dry, yeasty, Bollinger.

We opened the bottle as planned for G's birthday accompanied by some roasted nuts and olives. Not sure if it was the best food combination but we rather enjoyed it!

To describe the wine : It was dry and yeasty, and if my memory was better I could probably agree it was like Bollinger. It had a lovely clean fizz and a good flavour, slightly fruity, but not overly so. It was golden and had a good quantity of bubbles.

We were very impressed with our departure from the norm, and I think this will be featuring in our fridge again.

We were also able to try the Prestige '97 vintage at a wine tasting a week or so later, but too be honest, and I probably shouldn't admit this, but we rather prefered the Tradition which is the cheaper sibling. Oh well, I suppose that means we can have it more often!

Tuesday 12 September 2006

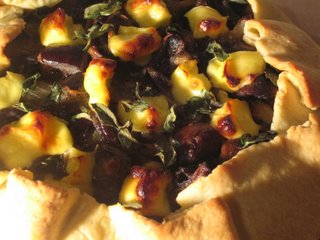
mush·room and au·ber·gine tart

Hay Hay! It's Donna Day #5! is being hosted by Running With Tweezers with the theme of savoury tarts. Hay Hay! It's Donna Day is the brainchild of Barbara of Winos and Foodies, it is at it's fifth iteration, but only the first I have successfully managed to enter on time!

A few ideas came and went for this round : a quiche, a pie, but when I got home last night and had the urge for a vegetable packed dinner I decided to make a vegetable pie. And to make it easy I thought I would try out a free form tart style. For some reason I have shied away from a tart made without the safety of a tin simply because I was afraid it would just collapse during the cooking. So imagine my surprise when not only did it not collapse, but turned out to be the crispiest, most perfectly cooked tart I have made? It must have been that the air could circulate so freely around the whole tart.

Mushroom and Aubergine Tart
Serves 4

Pastry
90g cold unsalted butter, cut into cubes
1 heaped cup of plain flour
large pinch of salt
iced water

Filling
1 small aubergine, cut into large cubes
400g mushrooms, halved
1 onion, cut into large chunks
2 tablespoons of olive oil
whole cloves of garlic, as many as you like, I used about 8
salt and pepper
100g feta, cubed
fresh marjoram leaves

Preheat the oven to 180°C.

Filling :
Toss together all the ingredients for the filling except the feta and marjoram and bake for about 30 minutes or until cooked and sticky and fairly dry. Set aside to cool.

Pastry :
Pulse the butter, flour and salt in a processor until it resembles course crumbs. Add iced slowly water until the dough just starts to come together. Tip out onto the bench and bring together into a ball. Wrap in plastic and rest in the fridge for at least 30 minutes.

Tart :
Roll out the pastry to approximately 1/4 centimetre thick into a rough circle on a piece of baking paper. Tip the filling into the middle of the circle and spread out slightly to an even layer, staying away from the edges. Crumble the feta and marjoram leaves on top. Fold the edges of the pastry up to form a shell. Rest in the fridge for at least 30 minutes. Bake for 40 minutes, or until the pastry is crisp and golden Cover the exposed filling with a piece of foil during the time if you feel it is browning to quickly, removing for the last 10 minutes.

Cut into wedges and enjoy with some steamed greens or a crispy salad.

Tuesday 5 September 2006

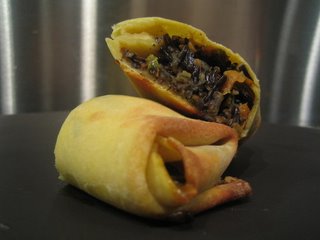
egg rolls

Paper Chef round 20! I found the list of ingredients at Tomatilla! rather challenging. Especially as I wasn't going to have a chance to get to the shops before the deadline. Luckily, I was able to approximate the required ingredients :

Eggs,
Black fermented soy beans,
Giblets and
Something that reminds you of Africa

with the following :

Eggs
Soy sauce - fermented soy beans, isn't it?!
Stock, made from a chicken including the giblets - a cop out perhaps, but mainly just doing what I am told!
Rice - I chose to use wild rice, because it is something that Africa can claim as indigenous.

Egg rolls

For the wrappers, makes about 8

1 cup of rice flour
1 egg
pinch of salt

Mix the ingredients together to form a stiff pasta like dough adding water as required. Knead until smooth. Rest for at least 30 minutes. Divide into eight and roll as thinly as possible.

Filling
1 onion, chopped
2 cloves of garlic, minced
Oil
One carrot, grated
1/2 cup of wild rice
1 cup chicken stock
1 teaspoon szechuan peppercorns, crushed
Handful of cabbage, shredded
Soy Sauce

Saute the onion and garlic until soft and turning golden, add the carrot, peppercorns and rice, stir well. Add the stock, bring to the boil and then turn down to a simmer until the rice is cooked, and the liquid is absorbed about 30 minutes. If too much liquid remains, add a bit of cornflour slacked with a wee bit of cold water to thicken the sauce. Stir in the cabbage.

Divide the filling among the wrappers, but do not over fill (you might have some filling left over). Roll into rolls or parcels. Brush with sesame oil and bake at 200
°C for about 20 minutes or until golden and crispy.

Serve with a dipping sauce made to your taste with chilli sherry and soy sauce.

Et voila! African inspired egg rolls - Thanks Owen!

Tuesday 29 August 2006

five things

With thanks to Haalo, and of course, Melissa from the Traveler's Lunchbox, I give you the five things I would recommend everyone eat before they die :

  1. the difference between sadly factory farmed and naturally organically reared meat, especially chicken and pork.
  2. something you have sown and grown then eaten at the peak of its existence - be that a herb, a vegetable, a fruit or a beast. For me, the pinacle (so far) is a broccoli I grew, then harvested and cooked and ate within about 10 minutes - definately the most delicious food I have ever eaten and has made me want to do it again and again and again and again . . .
  3. Butter so fresh because you have made it yourself - there is nothing to beat the freshness of your own unsalted butter - except your own butter from the milk from your own cow . . . not that I have a cow but I can dream . . .
  4. Pie : The perfect (yes made yourself with your own pastry) potato topped mince pie - mmmmmmmm!
  5. New Zealand sauvignon blanc - as fresh and tasty as a wine can get - albeit perhaps not as flash or expensive, but special and ground breaking to be sure.

I have never taken part in a meme before but there is a first time for everything, especially for something I felt would be so easy to complete . . . so if you feel the same join in and remember to link back to Melissa so she add your suggestions to the list!

Sunday 27 August 2006

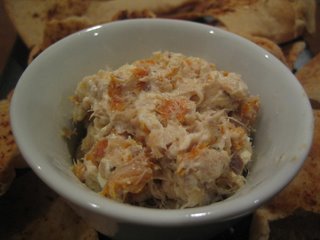
kip·per pâte

A packet of kippers needs to be cooked all at once, especially when you have you use the boil-in-the-bag method because the microwave is no longer an option (since it caught fire). But that is all good when there is also a bit of left over cream cheese and some horseradish in the fridge.

And that gives you all the ingredients for kipper pâte :

kippers
cream cheese
horseradish

Just blend together to your taste and serve with toast : hot buttered, grilled pita or what ever you might like to use to make a fabulous nibble from a load of leftovers.

Just the way I like it!

Thursday 17 August 2006

yams

Yams are one of the most Anthropomorphic foods. Don't you think?!

What we, in New Zealand, call yams are not what people in other countries call yams ; they are also known as Oca. They are sweet and starchy and are a great part of a roast dinner. Quite possibly my favourite part along with the potatoes, meat and parsnips of course. When they are roasted they become super soft with a lovely chewy skin. And so easy to prepare : just a brief wash and trim.

Somethings I do with yams :
  • throw them around a roast to become beautifully sticky.
  • roast them with dots of butter, honey and salt and pepper.
  • include them in a slow cooked stew, into which they will dissolve and thicken and sweeten the sauce.
A friend told me that if you put a couple of yams in a bucket of soil and leave it until the plants have grown and the leaves have died back you will have a bucket full of yams. How could I resist? I have an eagerly watched bucket on the go now. Just a matter of time!

Saturday 12 August 2006

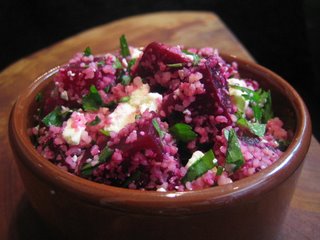
beet·root ta·bou·li

A twist on an old stand by, just perfect for lunch. A salad of roasted beetroot chunks, fresh herbs, tangy dressing, sharp and salty cheese, and chewy bulgar wheat. Looks good, tastes good and feels good too!

Bulgar is wheat that has been soaked, cooked and then cracked into pieces. A wonderful cupboard stand-by ; easy to store, easy to prepare and good for you all at the same time. I generally prepare bulgar as the base of a salad but occasionally use it to thicken and pad out stews. It absorbs flavour and is a good chewy, textured grain. My rule of thumb is to put about 1/4 cup of bulgar per person in a heat proof bowl and add the same volume of boiling water. Stir briefly with a fork then cover with a plate and leave for 10 minutes or so to soften. I have read other methods that use up to twice the volume of water and then require you to drain and squeeze the bulgar once it has softened : I find the same volume of water to wheat works well and is much easier!

The traditional herbs to be included in tabouli are parsley and mint, but I often include other similar herbs ; a recent discovery that worked well is Vietnamese mint. The proportion of herbs to bulgar are of course up to you but authentic versions lean heavily towards the herb.

I also like to add vegetables to provide a more complete dish if the tabouli is to be lunch rather than an accompaniment. Roasted root vegetables work very well, left over and cut up or specially prepared, either way! But for the prettiest salad, a beetroot roasted in foil at 160°c for about an hour, then peeled and cubed, is just the thing - staining all a fabulous pink.

For extra protein or tang or contrast or for no reason at all, add some crumbled feta.

All that is left is to make is the dressing, which is more like a series of events. I like to add a tablespoon spoon or two of nice fruity olive oil once the bulgar has absorbed the water. Then a good dose of lemon juice and salt and pepper. And finally as much garlic as I dare for the environment in which the tabouli is to be enjoyed. All of these things added before the herbs, vegetables or feta. With a final adjustment just before serving.

Yum!

Monday 7 August 2006

peach sal·sa

The final ingredients for the edition of , run once again by Owen at Tomatilla! are :

Cherries
Peaches
Any newly (re)discovered herb
Something spicy hot

It is a little difficult to find fresh stone fruit in New Zealand in the middle of winter, and since it is nasty and rainy here today I was not motivated to go to the shop to try to find some dried or other version. So I turned to the cupboard and came up with the following interpretations of the ingredients!

Kirsch, cherry liqueur
Canned peaches, the easy winter peach option!
Vietnamese mint, from the garden, easy enough to pick on my way in. I have only just started to grow this and have only used it one or twice.
Peppercorns, tellicherry peppercorns to be precise. Which, if pepper could be classed as a herb I could claim the tellicherry version to be newly discovered with this being its first outing in my kitchen. And come to think of it, I could claim this as the cherry part too, right?!

We are having steak for dinner tonight, and I thought a peach salsa would jazz up dinner and satisfy the paperchef ingredients at the same time!

Peach Salsa :

Peaches, canned or fresh, chopped
kirsch, a slug
Vietnamese mint leaves, shredded
Tellicherry peppercorns, crushed

Mix all ingredients together and leave for at least an hour for the flavours to meld. Serve as you would any salsa, perhaps as we are with a tellicherry peppercorn crusted steak.

I think this might fit the Paper Chef Home category since I did not have to buy any ingredients especially. And all could be substituted easily : how about a pear, whisky, mint and peppercorn salta tomorrow?

Sunday 6 August 2006

Eng·lish muf·fin

English muffin's egg-ring eggsploits eggsposed!
English Muffin, beloved of breakfasters everywhere, was found getting a freshly laid egg yesterday. A tip off was received by Jeanne and our canny reporters were on the case.
The only comment released was that the English Muffin wanted to be like her cousin MacMuffin, but she is English not Scottish! The lure of the perfectly formed fried egg laid on a toasted cheese base with a couple of rashers of bacon was too much for English Muffin to resist. We quite understand.


English Muffins
makes 9

300g of white stoneground unbleached flour
1/2 teaspoon of sugar
1 teaspoon of salt
1 1/2 teaspoons of yeast
1 tablespoon of shortening (or a mixture of shortening and butter, or all butter)
1/2 cup of buttermilk (why not make the butter to go with the muffins first and then use the resulting buttermilk!?)
polenta for sprinkling

Make a very soft dough with all the ingredients except the polenta. The dough should be very soft, tacky, but not really sticky.
Rise in an oiled bowl covered with plastic wrap for an hour or until doubled in size.
Prepare a proofing pan by lining a baking sheet with non stick paper, spraying with oil and sprinkling with polenta.
Divide into 9 pieces, shape into balls and place at least 2 inches apart in the proofing pan. Spray with oil, sprinkle with polenta, cover in plastic again and leave to double in size, about an hour.
Preheat a heavy pan to medium and the oven to 180
°C.
Spray or brush the pan with oil and gently lift the risen muffin dough balls with a spatular into the pan, only as many at a time as fit comfortably leaving enough room to turn them. Cook each side for about 4 minutes then put in the oven for 4 minutes.
Leave to rest for 30 minutes before eating.
Incidently, the correct way to open an english muffin is to push the tines of a fork into the circumfrance all the way round then pull the two halves apart with your hands!

Saturday 5 August 2006

four ways with cro·sti·ni


When I saw that Bron had chosen bruscetta and crostini as the theme for I thought it was the perfect opportunity to try out something I had been thinking about for a while.

I quite often make crostini as a way to use up the last bit of a baguette or ficelle. Having crostini in the cupboard is a great thing, they keep so well and make a brilliant snack with a bit of whatever is kicking around in the fridge to call a topping. More and more often I will use part of the dough when I am making bread to form into a ficelle just so I can make crostini.

I usually just make the crostini plain, but why not experiment with flavouring the toasts themselves as well as with the toppings? Why not indeed?!

So I give you four ways with crostini and some suggested toppings :

Plain - Slice a ficelle or baguette and brush or spray both sides with olive oil. Spread out on a baking sheet and bake at 180°C for about 10 minutes, turning over half way through, until golden and crispy. Top with - lightly crushed pieces of peppered mackerel.

Garlic - [my favourite!] Make as for plain, but when they are cooked rub a clove of garlic over the pieces. The garlic will grate onto the crostini, leaving a wonderful garlicyness. Top with - onion jam, half a black olive and a bit of anchovy fillet.

Mushroom - Make as for plain, but sprinkle the oiled pieces with some dried mushroom powder before putting in the oven. Top with - a paste made from mashed feta and some yoghurt with a few drops of truffle oil on the top.

Spiced - Make as for plain, but sprinkle the oiled pieces with a mixture of spices before putting in the oven. Top with - mashed leftover kumera made in the style of hummous with a bit of tahini and some more of the spice mix used on the crostini.

I was a little late with this so the round up is already done - I'll try better next time!

Friday 4 August 2006

sweet lab·neh

And now for a sweet verison! So simple to describe with the details already covered.

Step 1 : Take some thick strained yoghurt and mix with some liquid honey, warmed to make it runnier if you like.

Step 2 : Roast some walnut pieces by poing boiling water over them and leaving for 10 minutes, draining and then roasting in a hot oven for a few minutes until they are golden.

Step 3 : Peel and slice a kiwi fruit.

Step 4 : Assemble to mouthful size, with a slice of kiwi, and blob of sweetened yoghurt and a sprinkle of walnuts.

Lovely and light and healthy. Just the thing for getting over the indulgences of a holiday week!

Thursday 20 July 2006

spic·ed lab·neh

Since I make yoghurt, I like to use it in place of other dairy products where I can. I strain the fresh yoghurt through a coffee filter paper to drain off the whey, leaving it for varying lengths of time to produce different thicknesses. This is essentially labneh, or yoghurt cheese. Only straining the yoghurt briefly makes a thick Greek style yoghurt and leaving it for a good 24 hours gives a good thick cream cheese substitution. Somewhere in between lies what I use for sour cream.

I wanted to make a light but tasty nibble to take advantage of the baby carrots and radishes in the vegetable box. I wanted something that had some body but nothing too rich or heavy. And I wanted to use some more of the Balmain & Rozelle spice mix ; just the thing to mix with some thick strained yoghurt and serve with the vegetables.

Spiced Labneh

1/2 cup thick strained yoghurt
2 teaspoons (approximately) of your chosen spice mix. This could be garlic and fresh minced herbs, a favourite sauce, a selection of dry spices or for the easiest option a preblended spice mix.

Mix the yoghurt well with enough of your chosen flavour to suit you. Leave to rest in the fridge for an hour or so, then serve!

This could be served as a dip for crudités
, or served as composed bites as shown in the photo above.

quiche Lor·raine

I really wanted this to be the best quiche that I ever had, honestly I did.

I mean I love eggs, especially with cheese. I love pastry. So put them together and i am in heaven, right?

Well, right and wrong. The moral of this story is :

Never try to improve something you already love. Especially if what you love is made by your mother, and has been your entire life.

Saturday 15 July 2006

Balmain la·vash

When I made the semolina dough the other day I decided to use a bit to try to make a lavash style crispbread. I thought that adding a bit of flavour would be a good idea and thanks to A Year's Worth of Eating and Antipodean Blogging by Post I had just the thing :

Balmain & Rozelle spice - Fragrant spice blend. "A spice blend that celebrates the contemporary character of the area, supported by traditional Australian values". Including lime leaves, lemon myrtle, cumin, ginger, garlic, galangal, caraway and coriander.

I rolled out a portion of dough as thinly as I could, sprayed it with oil and sprinkled it with the spice mix. Then baked it at 190°C for about 15 minutes until it was crispy and golden. Break into pieces and eat. Very nice!