Thursday 25 September 2014

Nut Loaf

Don't laugh.

Don't laugh.  I said, don't laugh.  We had nut loaf for dinner this evening. When I asked G at lunchtime if he had any dinner requests, he replied :
Nut loaf.
I was three quarters sure he was serious, because he is a pretty-much-aside-from-the-odd-steak-vegetarian, but there was the 25% doubt.  But I thought sod him,
Don't kid with the chef.
So, as any good wife would do I submitted a search request to the google engine for a nut loaf recipe and came up with too many options.
For goodness sake. 
Why should something supposedly healthy and "better" than a steak be so time-consuming and complicated.  Did I really need to blanch cabbage leaves so I could wrap a faux sausage in a green presentation layer?  Should I really have thought ahead and sprouted some chickpeas?  Let alone knitted my own yoghurt for a garnish?  Garnish?!
Not on your nelly.   
So I parked early at school to pick up the M, walked to the supermarket and bought some mushrooms.  Aside from the usual things like eggs ,cheese and nuts, all you really need to make a nut loaf is mushrooms.
That is really nice.
Both the ingredient burden and the taste and pleasure in the final result was nice, no, great.  In fact the end product was so nice, we - 5 year old included - ate it all so I am cooking the spare one as we type, for lunch tomorrow.

Nut loaf

Adapted from several search results.makes 2 normal sized loaves, each serving 2.5 people (that is two parents and one 5 year old).

1 cup raw pecans
1/2 cup raw cashews
1 onion
500g mushrooms
4 cloves of garlic
1 teaspoon oregano
Port
175g cheese
A handful of parsley leaves
A sprig of fresh sage
1 cup cooked brown rice, 1/2 cup raw then cooked and cooled.
3 eggs
1/2 cup cottage cheese
Preheat oven to 180°c.
To make this recipe easier, get out your food processor.  Do not clean between uses.
Put a solid frying pan to heat on medium.
Pulse the nuts to a fine rubble in the food processor and put in a big bowl.
Pulse the onion to mince, and fry in some oil and butter in the pan until slightly golden.
Pulse the mushrooms, garlic and oregano until very small, but not a purée, and add to the pan with the onions.  Sauté until looking cooked then add a splash of port.  Cook a few minutes longer then turn off the heat.
Pulse the cheese, parsley and sage until rubble.
Add the herby cheese and rice to the nuts, then stir in the mushrooms.
Mix together the eggs and cottage cheese with a load of salt and pepper, but not too much!
Complete the mixture by adding the eggs/cottage cheese to the rest.
Divide the mixture between two baking paper lined loaf tins - or one large one - and bake for one hour.
Cool for a few minutes before serving on a 70s stainless steel plate surrounded by boiled kale (so now, so not!).
Enjoy the leftovers in a soft roll, pretending it is actually meatloaf. But maybe you won't do that.

Friday 12 September 2014

pump·kin ce·le·ri·ac soup


One of my favourite blogs, Cook Almost Anything, recently showed a wonderful recipe for Jap Pumpkin Soup with Curried Onions. I really can only begin to tell you what a clever idea I thought it was to have a fairly plain pumpkin soup (no offence Haalo!) punctuated with a wonderful relish of curried onions : the very onions and curry seasonings that would usually be blended with the pumpkin soup, kept separate to highlight all the elements - brilliant.

Whenever I need inspiration or a recipe I target the Food Blogs, both familiar and new. There is something trustworthy about a home cook documenting and photographing what they are cooking purely for their own, and others's, enjoyment. So tonight, with a verging-on-rotting pumpkin and a softening-a-bit-too-much celeriac (I know, I know, food waste - saved!) I knew just where to look for inspiration - a recently google-reader-ed recipe with a nice curried onion twist :
Pumpkin and Celeriac Soup with Curried Onions
Adapted from Cook Almost Anything's Jap Pumpkin Soup with Curried Onions
Serves 4

Olive oil
3 cloves garlic
300g pumpkin, any kind, peeled, seeded, chopped
1 medium celeriac, peeled and chopped
Chicken stock
1t butter
1 red onion, sliced
1t curry powder, or more to taste
Salt and pepper
Cream

Heat the olive oil in a large pot and add the garlic, pumpkin and celeriac. Sauté for a few minutes until the vegetables are starting to soften then add enough chicken stock
to almost cover. Simmer for about 15 minutes or until everything is cooked and tender.

Meanwhile, saute the red onion in the butter until soft then add the curry powder and continue cooking at a low heat until caramelised.

When the vegetables are cooked, blend with a stick blender or regular blender, seasoning with salt and pepper. Add enough cream to thin and enrich (to your taste) and reheat gently - not to a boil.

Pour the soup into warmed bowls and place a dollop of curried onions on top to complete the picture.

Evil Edna

sour·dough

One of the best times to have fresh bread is on a saturday morning : the crusts almost immediately with just fresh butter as a sneaky snack, then some more once it has cooled for a late breakfast/early lunch.

This is how I make sourdough :
Thursday night :
  1. Take the starter out of the fridge.
  2. Put half the sourdough starter into a big bowl.
  3. Feed both halves with the same amount of bread (strong) flour and water - so 1/3 starter 1/3 flour 1/3 water.
  4. Put the lid loosely on the starter and cover the bowl with a plate or damp teatowel.
  5. Leave both at room temperature with the jar on something in case it overflows.
Friday evening, as early as possible :
  1. Both the bowl and the jar should be bubbly and look alive.
  2. Put the starter in the fridge.
  3. Tothe bowl add 450g of strong bread flour, 1 1/2 cups of lukewarm water, 1 teaspoon of salt.
  4. Mix to a messy dough, adding a bit more water if necessary.
  5. Cover the bowl with a plate or damp teatowel.
  6. Leave at room temperature to prove until you are ready to shape the next day.
Saturday morning :

  1. The dough should be have bubble holes on the surface and look like a very soft dough, if this has not happened yet leave for few more hours since this will depend on the activity of your starter.
  2. Generously dust the bench with flour keeping a small pile for sprinkling nearby.
  3. Gently scrape the dough onto the floured bench.
  4. Pat into a rectangle and sprinkle with flour.
  5. Fold into 3 like a letter a couple of times to form a loaf, sprinkling flour as needed.
  6. Either place in a greased and floured loaf tin, place on a piece of baking paper or cut into rolls (but this will affect the baking time so trial and error here).
  7. Cover with a damp tea towel and leave for 2 hours or so to rise again.
  8. When you are 30 minutes from baking time turn the oven to 230°c and if doing a free form, not loaf, put a big cast iron pot with a lid in the oven at the same time to heat.
  9. When ready to bake either put the loaf tin in or put the free form loaf with the paper in the cast iron pot cover and bake for 20 minutes.
  10. Check and either bake longer as is, or for a darker crust remove from the tin or take off the lid and remove the paper and bake for another 5-10 minutes or until sounds hollow when tapped on the bottom.
  11. Leave to cool on a rack for at least an hour before slicing (except for sneaking the crusts which I don't think counts!).
How I look after the Starter :
  1. Don't screw the lid on tight, it needs to breathe!
  2. Keep in the fridge, but try to remove several hours or a day before using and feed (as Thursday above).
  3. Feed with a similar volume of flour and water.
  4. Try to feed once a week, but the odd two or so week wait will not matter, but a layer of alcohol (the sour) might be on top if left longer - either stir in or pour off.
  5. A sourdough starter is like a million pets in one little jar so be kind!

spic·y chips

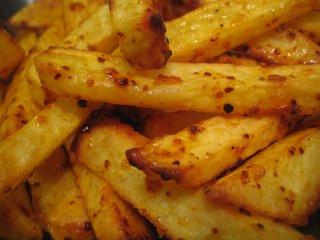
Here's a Friday night idea for you : Spicy chips eaten with mushy peas and vinegar.
Spicy Chips

1 large potato per person, about 250g each
Olive oil
Cayenne pepper
White pepper
Black pepper
Salt

Peel the potatoes and cut into fat chips. Put in a bowl of water in the fridge for at least 30 minutes.
Preheat the oven to 210°C, and put a large baking tray in to heat. Big enough to hold all chips in one layer. If there are more than two of you then you might need two trays.
Drain the potatoes and dry in a tea towel.
Toss in a dry bowl with enough olive oil to generously coat then toss to season with some cayenne, pepper and salt.
Spread out in one layer on the now hot baking tray and pop in the oven.
After 10 minutes turn the chips over. After another 10 they should be cooked, golden and delicious.
Serve with hot mushy peas and plenty of vinegar and relax . . .
These chips are reminiscent of the KFC beauties, a Friday night treat if ever there was one. Turn on the telly and enjoy!

fe·la·fel

Felafel are balls of chickpea goodness!

I make felafel on a regular basis. I think that part of their charm is that they take very little actual effort and that effort is best spread over several days ; however the finished product has the satisfaction of a more intense labour.

Felafel may be made from dried broad, or fava, beans or perhaps more commonly now, chickpeas. The most surprising thing about felafel is that the dried beans are soaked before use, but not cooked. I have made a recipe for felafel with cooked chickpeas and they fell apart terribly.

A felafel meal in our house includes pita, hummus, beetroot, garlic yoghurt, salad, pickled chilli and felafel.
Felafel
Serves at least 6

Soak about 500g of dried chickpeas in cold water with a pinch of bicarbonate of soda for at least 24 hours.
Drain, rinse and dry in a tea towel.
Put the now dry chickpeas in a food processor and process until very fine. Add a teaspoon of yeast and of baking powder, a teaspoon each of ground cumin, coriander and half a teaspoon of turmeric and some salt and pepper. Add a couple of cloves of garlic and if you like, some grated onion that you have squeezed dry and drained. Keep processing until a small amount sticks together when you press a pile together with your fingertips. This will take longer than you think, and if in doubt keep processing.
Leave the mixture to rest overnight, or at least a couple of hours.
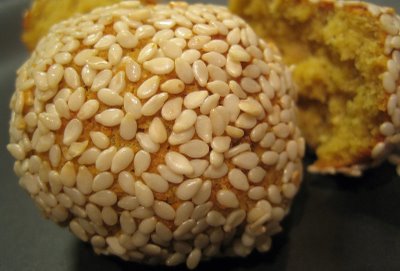
Roll the mixture into walnut sized balls, rolling in sesame seeds if you want.
Arrange the balls on a baking sheet. Spray with olive oil. Bake for 15-20 minutes at 200°C or until golden and delicious looking.

This will make approximately 36 felafel.

Tattie Scones

Better than bread, pancakes or toast!

So, what could be better than bread, pancakes or toast? For breakfast that is? Well the answer is all in the the title : Tattie Scones!

Tattie scones are Scotland's answer to the breakfast carbohydrate question. And there definitely is one!

How else can you use up left over potatoes be they mash or boiled?
How else can you prepare something tasty but with no last minute required attention?
How else can you make a very economical breakfast starch that is easy too?

Well I couldn´t improve on Tattie Scones!

Tattie Scones are perfect beside sausages, Lorne if you can get them or indeed make them, a slice of black pudding, a fried egg, beans and bacon.

You can make them ahead of time and freeze them, or just make the mixture and for maximum indulgence cook them in the bacon fat (if you do not need that for the eggs!).
Tattie Scones
makes 4 generous portions

450g left over mashed, boiled or baked potato flesh, or indeed freshly cooked
100g to 150g plain flour
salt

Mix the potato with enough flour to make a dough that is easily handled, adding salt to taste. If the potatoes were mashed or cooked with salt then make sure you don´t add too much. Remember that the tattie scones will probably be served with fairly salty things (bacon, black pudding, sausages).
You can rest the dough at this stage in the fridge until you are ready to cook them if you want the scones freshly cooked.
Heat a heavy frying pan to medium.
Divide the dough into four, form into balls and roll out on a floured surface to a circle to fit your heavy frying pan.
Melt a small amount of butter in the pan and cook each scone for a few minutes until it is starting to turn golden and puffy. Turn and cook with another knob of butter until the other side is done.
Cut into quarters and either cool then freeze or place in a 120°C oven until ready to eat.
To reheat from frozen place the quarters in the oven to warm while you cook your sausages black pudding, eggs, beans and bacon.
This is what Saturday morning brunches are made for.

spin·ach ri·cot·ta can·nel·lo·ni

Pretty rolls of green red and white.

A good purposeful vegetarian dinner, packed full of vegetables and protein is what us omnivores need more often. By purposeful I mean made on purpose, not just a meat meal with substitutions. For me vegetarian pasta is infinitely preferable to a meat packed pasta feast - to the extent of removing the sauce without the meatballs. Sure, the flavour is there, but spaghetti and sauce is much better and more meatballs for those that want them - nobody is complaining!

So here is a flavour packed dinner, infinitely adaptable.
Ricotta Spinach Cannelloni
Serves 4

8 pieces of lasagna, approximately 10cm by 15cm
1 tablespoon olive oil
1 small red onion, finely chopped
4 cloves of garlic, minced
500g passata
100mL red winefresh majorum, chopped
250g Perfect Italiano Original Ricotta
12 black olives, preferably Kalamata, chopped
2 tablespoons salted capers, rinsed and chopped
500g fresh spinach, washed well
Whole nutmeg
100g Parmesan, freshly grated
Salt and pepper
Cook the lasagna according to directions on the packet or if fresh until almost cooked. Drain and leave to cool on a tea towel.

Cook the spinach in a saucepan with just the water on the leaves, stirring often until well wilted. Drain and squeeze dry once cool enough to handle then chopped.

Sauté the onion in the olive oil until translucent, add half the garlic and cook for a few moments then add the red wine. Simmer for a few minutes then add the passata. Cook on a low heat for 15 minutes then add the majorum and salt and pepper to taste and turn off the heat.
Preheat the oven to 180°C.

Mix the Perfect Italiano Original Ricotta, olives, capers, spinach, a good grating of nutmeg, almost all of the Parmesan (reserving enough to sprinkle on the top before baking) and salt and pepper to taste.

Pour half the tomato sauce in an oven proof dish large enough to hold your rolled cannelloni in one layer.

Lay out the lasagna sheets and divide the ricotta mixture between them forming a sausage shape along the short end. Roll the cannelloni up, but not too tightly! Lay in the dish on the tomato sauce and pour the rest over the top. Sprinkle with the reserved Parmesan cheese.

Bake for 25 minutes then rest for 5 minutes before enjoying, perhaps with a lovely green salad. Mmmmmmmmmmm.
This is a great meal, especially since it is easy to make a modified version for the children of the house. My 9 month old daughter had a version with the sauce and filling before the olives, capers salt and pepper were added. Pretty handy . . . but messy!

win!

How would you like a wonderful Le Creuset baking dish, ramekins and spatula plus some Perfect Italiano Ricotta? Of course you would! And all courtesy of Perfect Italiano Ricotta. All you have to do is tell me in the comments your favourite way to use ricotta - it doesn´t have to be a full recipe, just an idea will do.

I will choose the idea I think sounds the best and the kind folks at Perfect Italiano Ricotta will send you the fab prizes shown above! Comments close in two weeks on the 10th May 2010. The winner will be notified soon after that. This competition is only open to New Zealand residents.

Come on, what are you waiting for!

con·grat·u·la·tions!

To save me the problem of choosing the best way to use ricotta in order to win some fabulous Le Creuset goodies and of course some Perfect Italiano Ricotta I decided to let random.org do the hard work! All the ideas were great and there will be some ricotta cooking going on all around.

So congratulations comment number 7 - Antony!

Please get in touch with me through the email link above with your address and contact details so I can arrange for your prize to be sent to you.

po·ta·to topped pie

New Zealand on a Plate! Sorry, Board.

Gosh! Could there be anything more New Zealand than a Potato Topped Pie. Sure, many, many countries have a starch topped pie. England has the Cottage Pie and the Shepherd's Pie, France has the hachis Parmentier and probably Australia thinks it has the Potato Topped Pie - but we Kiwis know better. But do any of these involve the all the magical ingredients of crisp pastry, savoury mince and creamy mashed potato all conveniently packaged in a handheld device?! No! Although Australia probably thinks it does . . .

Pies are such a New Zealand institution. There are so many occasions that a pie fits the bill : driving from Wellington to Auckland, Christchurch to Dunedin; a morning after a fine night out; a fine night out ; lunchtime; morning tea; at a rugby game; not at a rugby game; a cold and frosty morning; and the all encompassing student days - possibly replaced in our more responsible days with Sunday evening.

Pies are also seasonal, hot and comforting. They can be made from mince and cheese, just mince, possibly not just cheese (but once again I refer you to student days). They are freezable and you can make them in their entirety or the individual components ahead of time. The best time of year for a hot pie is of course winter, the perfect excuse to indulge in the pastry-potato-meat combination.


Potato Topped Pies
Serves 4

Pastry
150g Plain Flour
A Pinch of Salt
85g Unsalted Butter, chilled, cubed
Iced water to bind, approximately 4 tablespoons

Filling
2 stalks of celery
1 onion
1 carrot
2 cloves of garlic
2 tablespoons of butter
500g beef mince
1 tablespoon of plain flour
1 cup of chicken stock
1 bay leaf
Fish sauce to taste, approximately 1 tablespoon
White and Black Pepper
Salt

Topping
500g agria (or other floury) potatoes, peeled and cut up
Salt
White pepper
Butter, approximately 25g or as much as you like!
Milk, approximately half a cup of full fat
Grated cheese, optional

Make the pastry by mixing the salt and flour then tossing the cubes of butter through and putting in the fridge or freezer for at least 30 minutes. Then either rub the butter into the flour by hand or in several short bursts in the food processor. Add enough water to bind it into a ball then chill, well wrapped, for at least 30 minutes, or while you make the filling.

Make the filling by either chopping the celery, onion, carrot and garlic finely by hand or in a food processor. Sauté in butter until soft then add the mince, browning it well and breaking up the lumps with your utensil. Stir in the flour, mixing well, then add the chicken stock, bay leaf and the fish sauce. Bring to a good simmer then turn down to bubble away gently and come together while you make the topping. Leave the rest of the seasoning until you are ready to assemble.

Roll out the now chilled pastry and line 4 individual pie dishes (don't stretch the dough!) then return to the fridge while you make the topping.

Cook the potatoes then mash very well (we are looking for a fine mash, no lumps. Many a potato topped pie has been ruined with lumpy mash). Beat in the butter and milk to make a fairly loose mash then season to taste.

Check the seasoning of the filling and take off the heat.

At this point all the components can be chilled until you are ready to assemble and cook the pies.

When you are ready to cook, preheat your oven to 190°C and place a tray in the oven on which to stand the pies.

Fill your pastry shells three-quarter full with filling then arrange the potato on top as fashionably and as high as you dare. It helps stop the filling being pushed up over the pastry edge if you start with an edge of potato then fill in the middle and then pile it up on top. Sprinkle with grated cheese if you like then bake for 25 to 30 minutes or until the filling is starting to bubble and the top is golden and you just can't wait any longer.

It is up to you if you have peas, mushy peas or a nice green salad before, during or after your fabulous kiwi pie!

P.S. This post is an entry for the Hunt for New Zealand's Top Food Blogger with Rick Stein.


New Zea·land blog·ging by post

Don't you think it would be lovely to put together a parcel for a fellow New Zealand blogger, send it off, and then wait with excitement until a parcel full of goodies arrives on your doorstep for you?

Great! Then send me an email with the following details :
  • Your name and address.
  • Your blog's name and address.
  • Any allergies or things you would rather not receive.
I will then perform a complex algorithm and assign each person a recipient. I will only pass your address on to the person from whom you will be receiving a box.

For practical reasons with Christmas and holidays approaching, please email me by Sunday the 12th November. I will do the differential equations and email you the details of the person you are to post to by Wednesday 15th November. We will all post our boxes by Friday the 1st December, giving plenty of time for delivery and enjoyment of the contents before Christmas takes over.

And remember that because this is New Zealand Blogging by Post we can send anything we like - no customs and long delivery to worry about - this means home baking, cheese, honey - anything!

Let me know if you have any suggestions or queries!

Update - Jules has suggested a great idea - we should all include products that most tipify our regions, and products that are hard to get anywhere else, for example wild thyme from Otago.

mar·zi·pan cake

Here is a version of a Nigella Lawson recipe that just turned out so well ; she is right it is an Easy Almond Cake (from How to be a Domestic Goddess).

The almondness comes from marzipan and almond essence. It turned out I have three bottles of almond essence in my cupboard - no idea how they got there, I don't recall even buying one. I had some marzipan I had bought last Christmas for some thing I now can't remember.

This is all making me seem like a forgetful fool!


The only other thing you need to make this so easy is a food processor. You do not even have to ice it. Perfect. So if you can tick almond essence, marzipan and a food processor off your list along with some sugar, vanilla, eggs, baking powder and flour then you are ready to make the cake :

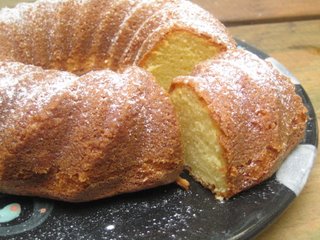
Marzipan Cake
makes a medium sized ring cake

175g soft unsalted butter, plus a bit extra melted
175g soft marzipan, cut into pieces
100g caster sugar
a few drops of almond essence
a few drops of vanilla essence
4 eggs
100g cake flour
1 teaspoon of baking powder
Icing sugar to sift over.

Put the tin in the fridge and preheat the oven to 160°C.
Process the butter, marzipan, sugar and essences together until smooth. Add the eggs one by one then the flour and baking powder and process until smooth.
Brush the cold tin with the melted butter which will solidify right into any pattern there might be.
Pour batter into the tin and bake for 30 to 45 minutes or until golden and tests cooked. Cool in the tin before turning out.
Sift over a bit of icing sugar to make it look pretty.

ha·ris·sa

Harissa can dress up many a dish :
  • Serve on top of a plain piece of griddled meat to turn it into something much more exciting.
  • Stir into yoghurt and use as a dip.
  • Include in a sandwich of left over roast meat to fool you into thinking it is not really left overs.
  • Use to marinate meat or vegetables before barbecuing to give an extra exciting edge.
  • Stir into yoghurt with some cornflour and use to coat chicken to make an easy Moroccan style chicken tikka.
  • Flavour a simple vinaigrette with a spoonful to make a great salad dressing.
  • Include as a relish in a mezze spread.
  • Dollop on top of a roast vegetable couscous to give another dimension.
Harissa is a Moroccan condiment which is usually really spicy. But you can make it yourself as hot as you like :

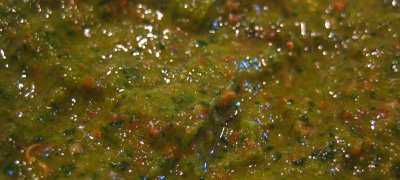
Green Harissa

1 tablespoon salt
2 tablespoons coriander seed
2 tablespoons cumin seed
6-8 green chillies (up to you!)
2 cloves garlic
1/2 cup extra virgin olive oil
1 cup coriander leaves

Toast the coriander and cumin seeds until fragrant. Puree all the ingredients together until smooth.

chick·en bar·be·rry·a·ni

This month Owen decided that Paper Chef should involve Barberries, Pumpkin, Spinach and Slow. I was rather pleased with the line up ; I had suggested barberries as a Paper Chef ingredient a wee while ago when I was seduced into buying a packet by the salesman's description of the tart red berries. Sadly, they had sat in my cupboard, unopened, until now. I had some pumpkin in the fridge and the silverbeet (my substitution for spinach) was looking perfect out in the garden, begging to be used for dinner. And slow . . . the perfect way to make a Monday night dinner!
When I first bought the barberries I found a recipe in Claudia Roden's The New Book of Middle Eastern Food for rice with chicken and barberries. The recipe describes it as the most famous and traditional of Iranian recipes, turning out like a pie with a crisp brown crust. To tell the truth this is what I set out to make this evening, but it is not what I finished with. As I was preparing the recipe I kept thinking this was rather like a biryani, so I decided to turn it into that instead, rather cunningly named as barberryani, do you not think!?
So that is the barberries, and, being slowly cooked at a low temperature with some of my homemade yoghurt, the Slow taken care of.
The pumpkin and silverbeet I turned into a warm salad, going rather well with the barberryani, both in terms of colour and flavour and Paper Chef.

Chicken Barberryani
serves 4

1 chicken breast
olive oil
1 cup of basmati rice, rinsed
3/4 cup yoghurt
1 small egg
a good pinch of saffron, soaked in boiling water
3 tablespoons of barberries

Sauté the chicken breast in a little olive oil, sprinkled with salt and pepper, until golden and almost cooked. Cut up into large bit-sized pieces.
Cook the rice in boiling water until almost, but not quite, cooked. A grain squished between your thumb and forefinger should have a chalky inside. Drain.
Beat together the yoghurt, egg, saffron and its water, and salt and pepper.
Mix the chicken into the yoghurt mixture to coat, then remove the chicken to a plate.
Mix the rice with the yoghurt mixture.
Heat a heavy bottomed pot with a lid over a low heat with a coating of olive oil. Tip the rice and yoghurt mixture into the pot and push the rice up the sides to make a shell. Sprinkle half the barberries over the bottom layer of rice-yoghurt then add the chicken pieces then the rest of the barberries. Cover with the rice from the sides and push down gently to even the mixture. Cover and cook slowly on a low heat for about an hour or until the top feels nice and hot. Turn out onto a plate or into a shallow bowl to serve.

Warm Pumpkin and Silverbeet Salad
serves 4 with the Barberryani

1/4 of a large pumpkin, peeled, seeded and cubed
olive oil
salt and pepper
3 large leaves of silverbeet (or a couple of handfuls of spinach), shredded
1 clove of garlic, minced
1 lemon, juiced
Black or normal sesame seeds

Preheat the oven to 180°C.
Toss the pumpkin with some olive oil and salt and pepper. Roast on a baking sheet for 30 minutes or until soft and caramelising. Meanwhile toss the shredded silverbeet with the garlic, lemon juice and salt and pepper in a large bowl. Tip the hot cooked pumpkin onto the silverbeet and toss to combine. Cover with a plate and leave aside until the silverbeet has wilted and the pumpkin is warm. Taste and add more oil, lemon, or salt and pepper before serving sprinkled with sesame seeds.

DMBLGIT : the win·ners!

There were so many wonderful photos entered in the October round of Does My Blog Look Good In This! The standard of photography was incredibly high ; we all enjoyed the task of judging. We decided on 3 categories : Aesthetics, Originality and Edibility as well as an Overall Winner.

Without further ado the winners of DMBLGIT October 2006 are :

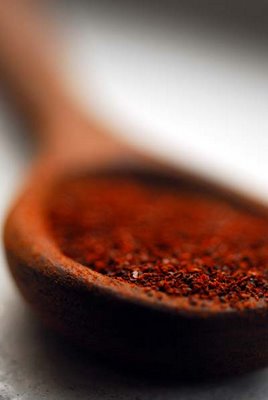
AestheticsChile Powder by Lisa of Homesick Texan using a Nikon D200 with a 55mm macro lens.

Originality
Pomegranate and peach sorbets in mini meringue baskets by Anita of Dessert First using a Canon IXUS 55.

Edibility
Caramel Apple Cake by Peabody of Culinary Concoctions by Peabody using a Nikon Coolpix 4600.

Overall winner
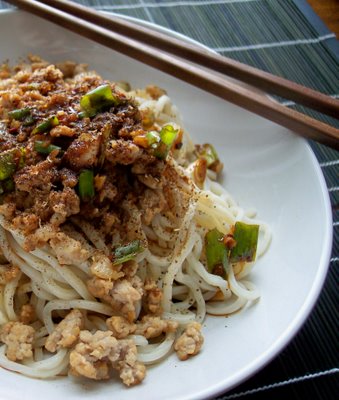
Dan Dan Noodles by Jenny of The Omnivorous Egg using a Kodak DX4530.

Thank you to everyone who entered, the judges, Bron, Bea and Mike, and Matt who has once again supplied the logo trophies for the winners to proudly show on their blogs!

Congratulations Jenny, Lisa, Anita and Peabody, please collect your trophies :


ku·ma·ra and chick·pea frit·ters

Last night we had baked kumara with steak and an awesome brussel sprout and cavalo nero dish as recommended specified by our fried Rachel.  However since I had decided to bake all the kumara in our possession so we could have them later there were 3 left.  I knew this wouldn't be a problem!  So tonight, with nothing much else left in the fridge we conjured up some fritters!  Hooray!  Past pie, nothing is better than a fritter.

Kumara and chickpea fritters
serves 3

Left over baked kumara, perhaps 3
1/4 cup grated parmesan
1 tablespoon flour
1/4 cup finely chopped parsley
1 400g can drained chickpeas
sal and pepper
oli

po·ta·to leek and ri·cot·ta pas·ty

pas·ty not past·y

I try to plan our week's meals. I also try to stick to the plan. Most of the time I do because it does make things easier, but sometimes the planned meal is exactly what we don't feel like eating. Last night was a case in point. I had thought that a nice Sunday night meal would be a salad followed by a pudding - a proper pudding with custard, you know. But come mid Sunday afternoon as the weather was getting cold all we wanted was something comforting, perhaps with pastry. Definitely with pastry.

We have got quite good lately at whipping up pies when we should have been having something more like a salad. But the beauty of things like this pasty is that the filling can be improvised with what you have on hand and pastry can always be made when you need it - of course there is flour and butter in the house!
Potato, Leek and Ricotta Pasty
Serves 4

Pastry
100g unsalted butter, cold
200g plain flour
A good pinch of salt
Ice cold water

Filling
500g potatoes, any type, peeled and cut into bite size chunks
3 large leeks
1 Tablespoon unsalted butter
Olive oil
150g cheese, any type, but cheddar is good, grated
250g Perfect Italiano Original Ricotta
Nutmeg, freshly grated
Salt and pepper

To Finish
A beaten egg

First make your pastry by sifting the flour and salt into a bowl, grating the butter into the bowl and mixing it into the flour then adding enough ice cold water to make a dough. Wrap the dough and put into the fridge to rest while you make the filling.

Put the potatoes into cold water with a dash of salt, bring to the boil and cook until well done. Drain (saving the water for making bread) and leave to cool in a big bowl.

While the potatoes are cooking trim the leeks and slice into fairly thin rings and wash well. Melt the butter and a dash of olive oil in a heavy pan with a lid then add the leeks and cook over a medium low heat until very soft and starting to colour. Add to the bowl of potatoes.

Preheat your oven to 190°C.

Mix the grated cheese, Perfect Italiano Original Ricotta, nutmeg, and generous salt and pepper into the potato and leek.

Roll the pastry out to a large rectangle and heap the filling down the middle long ways. brush the edges with a wee bit of water then bring the edges to the top along the filling and press well the seal then fold over and crimp prettily. Place on a metal baking sheet lined with baking paper and brush with the beaten egg. Place in preheated oven and bake for 40 minutes or until looking lovely and golden.

Cut into slices to serve. Enjoy!
And if you did still want that salad you can always have it along side . . .