Thursday 29 June 2006

cus·tard

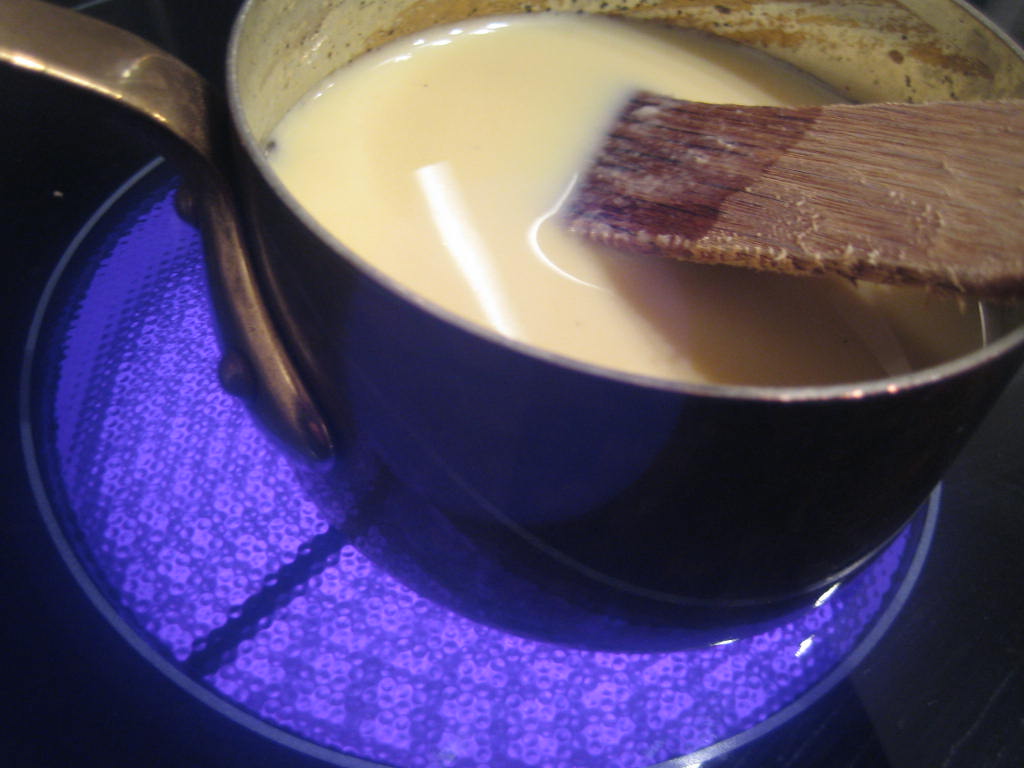
"You eat, in dreams, the custard of the day."” Alexander Pope

The blueprint for the custard I make is to use 100mL of milk to each egg. Adding sugar to taste at approximately 1 teaspoonful per egg. Beat the eggs and sugar then pour the warmed milk into the egg mixture, beating as you go. Pour through a sieve (to catch the solid eggy bits) into a pan and stir well over heat until thickened. The amount of heat and dedication to the stirring depend on your levels of confidence, which in turn depend on many things like your mood and the colour of the sky. On a usual day I actually turn the heat to medium high, stirring dedicatedly, to make a fairly quick custard. I realise that this is probably not the way I should do it. It is probably best to start low and stir well.

From there the variations can begin.
  • The basic vanilla custard is best made by infusing the milk with a split vanilla bean. For two of us I usually use 200mL of milk and bring to the boil with half a vanilla bean split in half. Then leave the milk to infuse for 30 minutes or so then strain the milk from the bean onto the beaten eggs and sugar. Otherwise you can add a splash of vanilla essence.
  • A richer custard is made simply by substituting part or all of the milk with cream.
  • A wonderful and different variation from Nigella Lawson involves infusing the milk with a bashed stalk of lemon grass. The mixture is sweetened with a simple syrup infused with lemongrass. Very nice and quite a curious taste.
  • This same blueprint can be used for a baked custard. Pour the mixture into an oven proof dish, stand in a larger dish, place in a 180°c oven, pour warm water into the outer larger dish to half way up the inner dish and bake for approximately 20 minutes (for a small amount) or until it is set but not stiff.
  • Coating the dish in which you bake the custard in caramel before pouring in the custard mixture produces crème caramel, perhaps my favourite dessert ever!
  • A custard tart is as easy as pouring the custard mixture into prebaked shortcrust tart case and baked at 160°c for approximately 30 minutes, again until it is set but not stiff.
  • Nutmeg adds a lovely flavour, especially to a baked custard.
  • Of course, baked custard lends itself to individual portions with the use of small ramekins.
Besides apple pie, custard goes very well with rhubarb crumble, stewed apple, trifle, caramel, pavlova, sponge cake, steamed puddings, sliced banana, sweet biscuits, bread and butter pudding, strawberry shortcake, meringues, strudel, shortbread, profiteroles, pastry . . .

May I invite you to have a look at the current Foodography challenge Hot! to which I submitted a photo of the custard cooking hotly?

Monday 26 June 2006

a pile of im·promp·tu food

This was a bit of a surprise : I had bought some prawns, but then Mama was able to stay for dinner, but there was not enough prawns for all of us so I had to augment the dinner with something else. Goodness me! What on earth would complement prawns without overpowering their subtle flavour, but could also stand up to the same marinade (but not in the same dish - cross contamination is not my bag baby!). Well fish of the land of course - chicken.

I minced. Up some chilli, garlic and olive oil. This syrupy mixture was smeared over (separate) piles of chicken goujons and peeled and deveined prawns, and left to marinate in the fridge for a couple of hours. When the time came to cook the beast of an impromptu feast, I took the precaution to preboil some basmati rice, and clean and trim some broccoli and pick (from the garden no less) and wash some parsley and Vietnamese mint. As the moment approached I set the grill to high and threaded some greased skewers with the [separate] chicken and prawns. Naturally the chicken takes longer to cook being the denser meat, but that is of no consequence, the chicken skewers are happy to be grilled for longer.

The serving is easy. Pile the rice on a platter, frill with some perfectly steamed broc, and form a pyre with the skewers of chicken and pram. All that is needed is the parsley and mint scattered atop.

Et voila, a big pile of impromptu food. Enjoy and dig in.

Friday 23 June 2006

gher·kins

Isn't that photo wonderfully toady? I do think that gherkins are a fairly unattractive food, but a good gherkin is not to be sniffed at. They complete the store of pickles that you might have in the fridge, sitting alongside the pickled onions, gleaming through the glass. Lovely! Maybe one day I will make pickled eggs. But the problem is will I want to eat them?

But they must be crunchy, and tart, but not too much so.

Gherkins form part of a perfect burger, perfect with a ploughman's lunch and an essential accompaniment to rillettes. I love it when, in autumn, you find a box of little gherkins in the shop just waiting to be pickled. I have not yet been lucky enough to find a plentiful supply of the tiny cornichons, but maybe next year.

As with the kimchi and pickled onions, you need to have a large preserving jar in which to pickle the gherkins, which needs to be sterilized and then sealed according to your chosen method. Here is an example.

I made gherkins like this :

gherkins, enough to fill the jar you are intending to use, I used a 1.5L preserving jar..
Salt, enough to generously toss through the gherkins.
600mL white wine or cider vinegar
1 cup of water
3 bay leaves
Whole allspice
Whole black peppercorns

Wash and dry the gherkins ,then toss with the salt and leave for 6 to 8 hours. I have found that over night is too long and results in a gherkin that is too soft, salt and acidic, but that is probably because I do not salt them just before I go to bed and proceed with t he next step as soon as I get up.
Mix half the vinegar and the water and use to rinse the salt from the gherkins in a large bowl. Drain and put in a sterilized jar with the bay leaves and some allspice and peppercorns. Cover with the remaining vinegar and seal the jar according to your preferred method. Leave for at least a month before trying the gherkins. Refrigerate after opening.

Wednesday 21 June 2006

pick·led on·ions

Man, I love the pickled onions! My friend B. and I share something special in our love of good pickled onions. Probably because most other people will not come near us when we have indulged. The best kinds of pickled onions come from fairs and fetes, or, even better your own kitchen.

The annual Thorndon Fair is held each November right outside our house and a jar of pickled onions is the one thing I try to buy every year. At the same time trying to resist buying the other things that will only leaving you thinking why? Why are there so many stalls selling soap? Why are there so many things into which to dip bread? Why? But it is all good fun and that is what the fair experience is all about.

I have made pickled onions before, but used malt vinegar and it was way too strong. This version using white wine vinegar is much more flavourful, allowing your tastebuds to detect more than the abrasiveness of oxidised ale.

I decided to include some whole chillis from our plant to provide a short cut to the picked chillis we eat whenever we have burritos. I think that it worked rather well.

As with the kimchi, you will need to have a large preserving jar in which to pickle the onions, which needs to be sterilized and then sealed according to your chosen method. Here is an example.

I made pickled onions like this, and B. approved :

Pickling, or small, onions, enough to fill your intended jar, I used a 1.5L preserving jar.
Sea salt
A couple of whole chillis
Cloves
Cinnamon
Peppercorns
200g of sugar
600mL white wine vinegar

Trim the tops and roots of the onions, leaving the root intact but hairless.
Pour boiling water over the onions and leave for 30 seconds. Drain, then cover with cold water and peel.
Place in a bowl, sprinkle with salt and leave overnight.
Rinse and dry the onions and place in the sterilized jar with the chillis, a few cloves, some peppercorns and a bit of cinnamon.
Bring the vinegar and sugar to a boil and pour over the onions. Seal.
Leave for a month before eating, and refrigerate after opening.

Monday 19 June 2006

kim·chi

As soon as I read that kimchi may cure bird flu I knew what I was going to make with the last of the bok choy in the garden. Especially since once again I had left the plants in the soil until they were past their best. These bok choy were mainly stalk with most of the leaves eaten by the resident caterpillars ; a steaming pile of fresh Chinese greens was out of the picture for these plants.

Whether or not the spicy fermented cabbage will guard me and mine from H5N1 is yet to be known, but I do know that this smelly spicy pickle feels like it does you good!

You need to have a large preserving jar in which to ferment the kimchi, which needs to be sterilized and then sealed according to your chosen method. Here is an example.

This is how I made my version of tamiflu :

Bok choy stalks and leaves, enough to cram into, and fill, your intended jar, torn into pieces
Saline solution made from 3 tablespoons of salt dissolved in 750mL water
Garlic, about 3 cloves, chopped
Ginger, about 2 inches, chopped
Chillis, as many as you fancy, chopped
Red onion, about 1, sliced
2 tablespoons of fish sauce
1 tablespoon of soy sauce
2 teaspoons of sugar
1 tablespoon of salt

Wash the bok choy and immerse in the saline solution and leave over night.
Drain and rinse the bok choy, leaving to soak in fresh water for about 15 minutes.
Drain the bok choy and mix with the garlic, ginger, chilli and onion and pack into a jar.
Dissolve the sugar and salt in some warm water and mix in the soy and fish sauces, then pour into the (sterilized) jar.
Top up with water and seal according to your preferred method.
Leave at room temperature for at least 24 hours then refrigerate once opened.

NB : Be careful where and how you store this vicious pickle. Mine fermented a tad to vigorously and broke the seal spilling stinky juice in the pantry. Consider yourself warned - this was not nice!

Tuesday 6 June 2006

black swan vin·da·loo

In honour of the Queen's Birthday, which was celebrated here in New Zealand yesterday, Monday 5th June, I give to you Black Swan vindaloo : celebrating the extent of the empire from India to New Zealand!

In many countries in [what perhaps once was] the British Empire, it is believed that the Queen owns all the swans and therefore it is a crime to kill and hence eat a swan. But according to my research just now, it seems that the Monarch of the United Kingdom traditionally only owns all unmarked mute swans on the River Thames. We are not near the river Thames and the swans in the Wairarapa don't seem to be mute. Let the games begin! In modern day New Zealand, the black swan has a season in which it can be hunted. So fear not! The swan of the vindaloo is entirely legal.

I was given some black swan breasts by my brother-in-law who in turn was given them by a friend at work. We had no idea what we should cook with the swan meat. All we were told is that they can be tough, bitter and rather strong tasting and therefore best to marinate the meat overnight in milk or beer. I had been reading lately that marinating in alcohol can result in a tougher meat so I decided to marinate the swan breasts in milk. But then what? But inspiration struck - what better treatment for a strong meat than curry, and what better curry than a vindaloo?

So how was the swandaloo?

The swan meat, to me, was like a poor cousin of beef or venison. Dark and strong but not that handsome. I would rather have a beef or lamb vindaloo and if I have some venison then a medium rare steak is the order of the day. So frankly glad to try but should the opportunity rise again, I think I will order the bambi cutlet rather than the swan lake stew . . .

I thought that this post would be more about the black swan than the vindaloo, so I will leave you with a link to a previously posted vindaloo recipe - feel free to use any meat you have to hand : supermarket, butcher, hunting-trip, or road kill!

By the way - I apologise about the photo. We did not take a picture the night we ate it because while a photo can delay dinner at home, a dinner at a friend's house is a different matter, and we took the swan to our friends's house to share! I took the photo the next day with the leftovers I was saving to give back to my-brother-in-law so there were no accompaniments - but I thought it would be educational to illustrate how dark swan meat is and how it is like venison or beef. Long story, but there you have it!