Friday 31 March 2006

roast pheas·ant

I had not eaten pheasant before so when the butcher told me they were getting in some fresh pheasant, duck and quail I knew what I had to do. I ordered a pheasant and then started to do some research.

Most people I spoke to said that pheasant was dry and full of shot. Sounded pretty good. However my mother reassured me by saying she thought it was delicious but you have to be careful how you cook it because it does have a tendency to dry out. That was more like it! As long as you have to just be careful things should be OK. I can be careful, in fact I usually am.

I picked up the pheasant still not entirely sure how I was going to cook it, so just to be careful I also got some streaky bacon* for laying across the breast to combat the dreaded dryness.

It was really good, up there with my favourite meats - the best description I can give to the other not-yet-pheasant-initiated is that it tastes like really, really good chicken. Of course it does.

In the end I cooked the pheasant like this :

A few hours before you want to eat unwrap the pheasant and remove the giblets from the cavity to a bowl for later**. Cut off the first wing joints and add to the giblets. Rinse the pheasant inside and out and dry with a paper towel. Season the pheasant inside and out with salt and pepper. Put some rosemary, thyme, tarragon, a strip of lemon peel, clove of garlic and a knob of butter in the cavity and put in the fridge to wait so the flavours can penetrate the meat. Do not truss.
When you are almost ready to cook, remove the pheasant from the fridge to come to room temperature.
Preheat the oven to 220°c.
Prepare the roasting tin by buttering a slice of bread and laying the pheasant on its side on the slice of bread***.
Roast for 12 minutes then turn over to rest the other side on the bread and roast for another 12 minutes.
Remove from the oven and leave to rest, tented with foil on a chopping board, for at least 15 minutes.
Served with sautéed
potatoes and a garlicky dressed green salad for a blimming delicious meal.

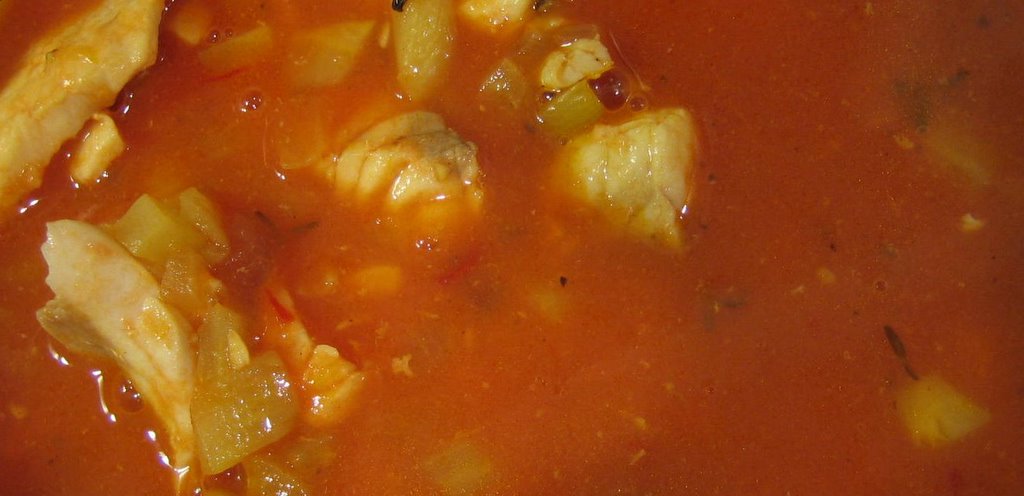
*I didn't end up using it for the pheasant, but instead here, and for some bacon sandwiches.
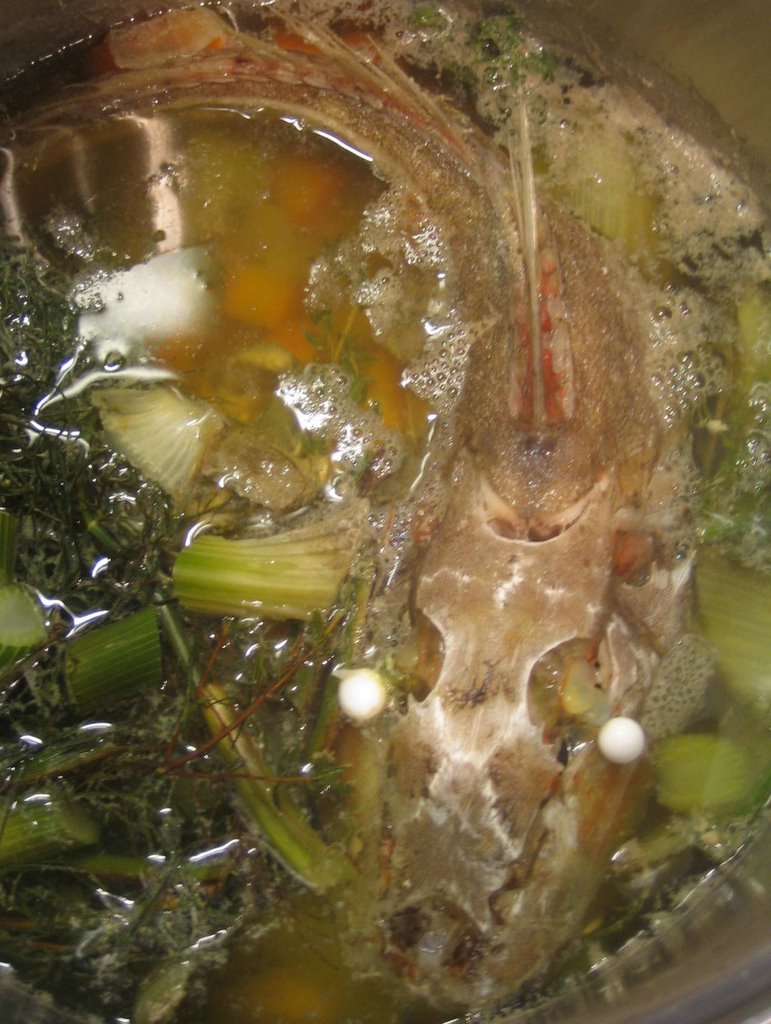
**Game sauce to come!
***Very important for a special treat, details to come soon. And to stop the pheasant sticking.

Thursday 30 March 2006

choc·o·late mac·a·roons

I do not know if a macaroon is truly a petit four, but I like to think of them that way. The literal translation of the French phrase "petit four" in English is "small oven", which became associated with the small cakes because the cakes were cooked in a brick oven as it was cooling, therefore not wasting any of the expensive heat. The culinary definition of petit four is a cake layered with butter cream icing and covered with pretty coloured fondant icing. Macaroons are not quite as rich as some petit fours, but rich enough never the less. I particularly like the way the chocolate ones look like mini-hamburgers. I am going to try a version with a pistachio or raspberry filling, just to push the burger image a little more - or would in fact a plain macaroon with a dark chocolate ganache filling work better - I will have to find out!

I made the chocolate macaroons like this :

macaroons :
80g ground almonds
140g icing sugar
10g cocoa powder
2 egg whites

15g caster sugar
a pinch of cream of tartar*

ganache :
50g cream
100g dark chocolate, chopped,
splash of liqueur - I used cointreau but Amaretto would probably have been better if I had had some.

Beat the egg whites, caster sugar and cream of tartar until stiff peaks form.
Sieve the almonds, icing sugar and cocoa together onto the egg whites and mix well to form a paste - do not worry about keeping the egg whites full of air.
Pipe (or spoon) the mixture into small, or indeed larger, blobs onto a paper lined baking sheet, leaving space for them to spread. Have more sheets than you think ready, this amount of mixture filled 3 sheets with a bit of mixture left.
Leave the trays out to dry for an hour to form a skin - this gives the distinct layers.
Make the ganache by heating the cream to almost boiling then pouring it over the chocolate to melt it. Beat in the liqueur and leave to cool at room temperature.
Bake at
200°c for 5 to 10 minutes, keep an eye on them, they can burn quite suddenly.
Leave to cool on the paper before peeling off.
Beat the ganache with a wooden spoon until lighter in colour and texture then use to sandwich the macaroons.

*I have often wondered what cream of tartar does in egg white concoctions like pavlova and meringue : wikipedia - Stabilises egg whites, increasing their heat tolerance and volume. Well there you go!

Tuesday 28 March 2006

warm spin·ach sal·ad

I had been resisting harvesting the spinach from the garden because it looked so nice. The aesthetic pleasure was at the cost of tenderness of the spinach leaves. They were ginormous and a bit holey thanks to the caterpillars. I harvested them this morning purely to make way for the broccoli. The problem with trying to be an organic small scale urban farmer [sic] is caterpillars ; caterpillars eat the plants you want to eat and then hold on (literally) for dear life as you are preparing them for your own meal. The best way I have found to remove the beasts is to soak the vegetable in several changes of salty water.

I wanted to taste my first spinach as unadulterated as possible. The sensible thing seemed to be to separate the (now clean) leaves into perfectly formed, could be eaten raw and bit holey, best cooked. The former are waiting in the fridge to be lightly steamed and eated alone. The latter were turned into a warm spinach salad. I realise I probably should have eaten the perfect leaves as soon after picking as possible to enjoy their splendor at their peak and all that, but I didn't.

I made a warm spinach salad like this :

3 rashers of streaky bacon, cut into small pieces.
1 shallot, diced small.
1 tablespoon of vinegar - sherry is good, otherwise whatever you have.
1 slice of good bread, cut into cubes.
A good double handful of spinach leaves, torn into pieces.

Combine the shallot and vinegar and leave aside for the shallot to soften.
Fry the bacon on a medium to low heat to allow the fat to render and the pieces to crisp.
When the bacon is starting to crisp and there is plenty of fat in the pan, but the bacon still has a wee way to go to be crispy, toss the bread cubes in the fat to absorb some of the fat then remove the bread to a pan in a warm oven, or another frying pan. The bread cubes are removed because we want to save some of the bacon fat for the dressing.
As soon as the bread cubes have turned into crispy croutons, throw the spinach into the frying pan and pour over the shallot and vinegar mixture. Toss until the spinach is just wilted then pile onto a plate and top with the croutons.

I can honestly say this was the most spinachy spinach I have ever had - wonderful. Was it because it was picked so close to cooking, or because the spinach had been allowed to reach a greater level of maturity?

Sunday 26 March 2006

chest·nuts

Chestnuts, roasted chestnuts in particular, are ones of the highlights of autumn for me. Roasted chestnuts are a very nostalgic dish, bringing memories of a happy childhood ; but also memories of an awful lot of fun in London town. I look forward, every year, to seeing these handsome nuts in the shops, it seems to make up for the golden queen peaches leaving the shops.

Mum has usually roasted chestnuts in the oven, but I have vague memories of them roasting over an open fire - is this just a romaticised memory? I will have to check.

This is the sort of food for which you must work. Like spare ribs, chicken wings, artichokes and prawns. That is a list of my favourite foods!

While working for your food is a good thing, you do not want to work too hard. This is how I roast my chestnuts in order to give the satisfaction of a bit of work, but to make that work as easy as possible :

Cut a cross in the flatter sides of the chestnuts.
Soak the chestnuts in cold water for an hour.
Preheat the oven to 200°c.
Drain the chestnuts and roast in the oven for 20 minutes.

Peel each chestnut as you go with the help of a serviette, dipping in some salt as you eat.

The soaking and the residual water in the skins helps with peeling the chestnuts, but this will get more difficult as they cool down. To help them stay hotter for longer, keep wrapped in a serviette as you eat.

Just the thing for a cold and wet weekend.

Friday 24 March 2006

lem·on pars·ley chick·en

Lemon parsley chicken is a fantastic stand by, quickly made. All you need are some chicken breasts, lemon juice, parsley and butter, with a few other ingredients that you will probably have on hand any way. Just the thing for Too Many Chefs's Make it in !

Not too hard to describe, just fresh and lemony and green and fragrant. I particularly like it served with orzo, which cooks really quickly, but basmati rice is very good also. Something for the sauce to soak into. A simple salad is all you need to make a complete meal in less than thirty minutes.

This is how I make it * :

What you need :
Chicken breasts, tenderloin cut off and the main part sliced horizontally to make two thinner pieces.
Butter
Olive Oil
Flour, seasoned
Parsley, chopped
Lemon juice
Chicken stock

Orzo or basmati rice
Lettuce

The thirty minute countdown :
00:30 - First of all put the water on to boil for the rice or orzo.
00:29 - Pour yourself a glass of wine.
00:25 - Heat a frying pan to medium and when hot, add a good knob of butter and some olive oil.
00:20 - Toss the chicken in the seasoned flour then fry gently until golden and cooked through.
00:17 - Put the rice, if having, on to boil.
00:13 - Turn the chicken over
00:12 - Rip some lettuce into a salad
00:08 - Put the orzo, if having, on to boil.
00: 07 - Remove the chicken to a plate to keep warm.
00:06 - Degalze the pan with some lemon juice, then add enough stock to make a good sauce. Add more lemon juice and salt and pepper to taste. Allow to bubble up then add a knob of butter and the parsley.
00:04 - Return the chicken to the pan to heat through.
00:02 - Drain the rice or orzo.
00:00 - Serve the chicken on the orzo or rice and pour over the rest of the sauce.

Lovely!


*I have left the quantities vague because this is very easy to scale, and it all depends on your hunger and how much sauce you want. And of course how many you are to feed!

Thursday 23 March 2006

pep·per moz·za·rel·la bas·il

To continue the light yet tasty morsels we took on saturday night to eat before the jugged hare . . .

Sometimes you have an image in your head of how you want things to look, but are not sure what is going to be used to create it and other times you know what you want to use but you have no idea how put them together. This was a : got basil, got whole chargrilled peppers, got mozzarella - now what do I do?

I wanted to stuff the peppers, and although these were quite small they were more than a mouthful ; instead I tore them into strips. I sliced the fresh mozzarella into long chunks and separated the basil into leaves. All I needed to do then was to wrap a strip of pepper around a basil leaf and chunk of mozarella, securing with a toothpick as I went. I really didn't want to use the toothpicks, but it was otherwise going to become a nice tossed Insalata di Mozzarella, Peperoni Arrostiti e Basilico on the journey over - not exactly finger food.

I love little bites, I think they are one of the best ways to eat.

Tuesday 21 March 2006

rad·ish

Radishes are wonderful, especially when then are the first vegetable (excluding herbs) that one harvests from one's new garden!

We were going to a friend's house for jugged hare (delicious!) and we all agreed a fairly light starter of fairly light nibbles would be a perfect way to ease into dinner. I took a couple of things, of which radishes were one.

I had heard many times how good radishes were eaten with fresh butter and salt. I love radishes, butter and salt, so putting them all together was not a risky proposal.

They were delicious, especially when you indulge yourself and recreate the radish flowers that your mother used to make when you were little.

Saturday 18 March 2006

white bean soup

This is a very simple soup that can be made quickly with very little effort. It becomes amazing with just a few drops of a flavoured oil added as it is served. I recently bought a small bottle of white truffle flavoured olive oil and a few drops of that, as you might expect, really makes this soup devine.

The key ingredient is white beans. The specific type does not really matter, and even the whiteness is probably optional, except that part of the charm is in the colour. I often use butter beans, but haricot beans are another good option. I generally use dry beans that I soak and cook, but I am sure a ready-to-go tin of beans would be just fine too. This soup tends to appear when I have cooked some beans just a bit too much and they are starting to fall apart.

There are options in the degree of effort you want to invest :

The simplest is to just purée the beans, some of their cooking water and some salt and pepper, serving with a drizzle of flavoured oil.

A nice middle ground between no effort and some effort is to add a bit of stock or garlic to the purée.

And the whole hog involves sweating some aromatic vegetables then adding the beans and stock, puréeing and then passing the mixture through a fine sieve to make the soup even more velvety and smooth.

This is real frugal food with great pay off in nutritional value, percieved effort and depending on the flavouring used, variety!

Wednesday 15 March 2006

seared beef and rice

It is not often that I will choose to eat a fine piece of aged sirloin steak other than plain, griddled to pink perfection, and served with eye-wateringly hot English mustard. But change is good. It allows one to appreciate the differences and thereby make educated decisions when asked - "What would you like for dinner?" - rather than just saying - "I want that one".

So how else can a fantastic sirloin steak be prepared that almost compares to its plain excellence?

Marinating the steak in a savoury sauce then serving it griddled juicily rare and thinly sliced.

This can then be served in a light broth with noodles, or atop rice with the marinade boiled into a sauce and poured over, or in a lovely crunchy bread pocket. Stringed green beans, bok choy or butter crunch lettuce go so well. This way of preparing and serving a steak is, to me, health giving, not too heavy, yet satisfying.

It is important to choose a good steak which will be tender and tasty when served rare. And choose a thick enough piece so it has time to cook to a good crust in a hot pan yet still leave the inside rare. One thick steak is best for two people, rather than two thinner ones.

I marinate the steak in a combination of worcestershire sauce, wasabi paste, olive oil, soy sauce and a minced clove of garlic (or what ever else I fancy) for as long as I have got, perhaps an hour or two.

Put some some rice or noodles to cook. Or warm some bread.

Get the griddle really hot then cook the steak for a couple on minutes on each of the six sides then wrap in foil and leave to rest while you prepare the sauce and vegetables.

Bring the marinade to a boil in a small pan and add some more of the marinade ingredients or other things such as chilli sherry as you like. Or prepare a broth with miso, or stock and some of the marinade ingredients.

Steam some green vegetables or get out some lettuce.

Thinly slice the steak and lay on top of the cooked rice and noodles, or inside a bread pocket. Pile up the vegetables and pour over any sauce or broth.

So good. But I still prefer a plain steak and hot English mustard.

Sunday 12 March 2006

phoe·nix tail

Phoenix tail mushrooms seem to be the same as oyster mushrooms and often seem to be called phoenix tail oyster mushrooms but this page suggests otherwise. The scientific name of the phoenix tail mushroom is Pleurotus sajor-caju and of the oyster mushroom Pleurotus abolonus. Therefore they both belong to the same genus but are a different species. Other mushrooms in the genus are the common oyster (Pleurotus ostreatus) and the golden top oyster (Pleurotus citrinopileatu).

The reason this matters is that I felt like garlic mushrooms to eat with bread for an entrée. I wanted to have something a little more interesting than regular button mushrooms, and my eye settled on the phoenix tail of which there seemed to be two choices ; however on closer inspection one was phoenix tail and one was oyster. I chose the phoenix tail but I wanted to check if I was missing something and needed to get the oyster some other time.

The producer of the phoenix tail, Mushroom R&D, describes them as fan shaped mushrooms with a delicate subtle seafood flavour. I am not sure if I could detect a subtle seafood flavour ; but I think subtle was lost with the garlic butter in which I fried the mushrooms.

Garlic mushrooms are so good, especially if you decide that a bit of butter is good for you and that garlic is just what you need. And as for the mushrooms - essential minerals (selenium, potassium, copper) and B-complex vitamins (riboflavin, niacin and pantothenic acid).

I put some butter and as much garlic as I feel like peeling and chopping in a frying pan on low, letting the butter slowly melt and take up the flavour of the garlic. Turn the heat up to high and when it is sizzling throw in the mushrooms and quickly sauté them. Serve immediately and use some crusy bread to mop up the garlicky buttery juices.

Friday 10 March 2006

crème car·a·mel

I have just bought the most beautiful terrineand frankly I could not resist using it to make my favourite dessert for this round of - the dairy edition, as decreed by Andrew at Spittoon Extra.

An old favourite made in a new shape. And to make it even trickier, a new recipe, the recipe in French, from the booklet that came with the terrine. Oh! I couldn't even cheat - the English and German recipe sections did not have the crème caramel recipe, but instead a recipe for spiced fruit loaf! Make of that what you will.

The recipe for crème caramel from the Le Creuset recipe booklet, as interpreted be me is :

Crème Caramel

750mL milk
1 vanilla pod
150g caster sugar
6 tablespoons of water
butter for greasing the terrine
6 eggs
75g caster sugar

Lightly butter the 28cm ot 1.2L terrine.
Put the milk in a pot, split the vanilla pod and scrape the seeds into the milk, add the pod. Heat until almost boiling then turn off the heat and leave to infuse while you make the caramel.
Put the 150g sugar and the water in a heavy bottomed pot. Keep on a low heat until the sugar is completely dissolved so the caramel does not crystallise. Once the sugar has dissolved turn up the heat and boil until a good caramel is achieved. Keep an eye on it because it can change very quickly. Pour the caramel into the terrine to cover the sides and bottom of the dish. Leave to cool.
Put a pan with enough water to come half way up the terrine in a
150°c oven to heat.
Beat the eggs and the 75g sugar, add the infused milk discarding the vanilla pod. Sieve into the caramel covered terrine. Without covering with the lid, place in the bain-marie and cook for 45 minutes or until it is set and a knife inserted comes out clean. Leave to cool then refrigerate.
When ready to serve run a knife around the edge then stand in a sink of hot water for a few minutes to melt the caramel. Turn out and slice to serve. The longer it is refrigerated the easier it will be to turn out and the better it will keep its shape.

I honestly didn't think my mother's recipe could be beaten, and while this is not too different (more eggs), this was incredibly good, it could have been the terrine, and to test this, next time I will follow mum's recipe cooked in the terrine.

I have posted the photo above to the
flickr group foodography 2 : Dairy - Have a look, there are some great photos!

Wednesday 8 March 2006

fish soup

If you have some fish stock you can make fish soup, fish stew or a sauce for fish. Myself, I love fish soup. My favourite is the smooth kind served with rouille, croutons and Gruyère. But when you want fish soup for a week day dinner rouille is most definately out of the question, croutons are pushing it, and the Gruyère, if you have some, will probably be eaten as pudding. Fish stock is easy, rewarding in its homemade-ness, and quick enough to make before making an equally quick soup.

Once you have a great base like homemade stock, a soup is as simple as sautéing some vegetables, deglazing with a bit of wine, adding the stock and maybe some other vegetables like tomatoes, then simmering for a wee while. If you would like a more substantial main course soup, then poach some meat, fish or heat some pre-cooked pulses in the soup for the last few minutes. Simple! This is the sort of autopilot cooking that I find so thereputic at the end of a day at work : a bit of chopping, a bit of stirring ; nothing too urgent. Especially so, if things, like the stock, are premade and everything else is ready to go.

I make fish soup like this :

1/2 an onion, chopped
1/2 a fennel bulb, chopped
3 cloves of garlic, minced
1 dried red chilli, chopped
the leaves from a sprig of thyme, chopped
a pinch of saffron
white wine to deglaze - a glass or so.
a cup of fish stock
a tin of whole peeled tomatoes, pureed with a stick blender and then sieved (poor man's passata!)
400g of mixed white fish fillets, cut into chunks. For example trevally, tarakihi or gurnard- as many or few different kinds as you fancy.

Sauté the onion, fennel, garlic, chilli, saffron and thyme in olive oil until the onion is soft and starting to turn golden. Pour in the wine and scrape any bits from the bottom of the pan. Add the stock and tomatoes. Bring to the boil then reduce to a low simmer. Adjust the seasoning as you like. Cover and leave to simmer for fifteen minutes or so. When you are ready to eat drop in the fish pieces, they will only take a few minutes to cook.
Serves two generously with some crusty bread to accompany.

Monday 6 March 2006

prawn mousse

I was very happy to see the announcement of #16 on Tomatilla! - finally a chance to use the bottle of verjuice in the cupboard. This is my second bottle, the first went to make a delicious verjuice sorbet - a perfect sorbet (simple syrup and verjuice), and was used once to deglaze a pan. The other ingredients are basil, prawns and an ingredient inspired by the movies in honor of the Oscars.

Basil and prawns are fine, but the Oscars - I was a bit lost. I tried to think about King Kong, a film made down the road. I then tried to think of Narnia, but turkish delight cannot go with prawns (or maybe it can melted as a sweet dipping sauce . . . ?). I entertained the notion of a surf and turf using (Wallace and Grommit's Ware-)rabbit and prawns, but just didn't fancy it. I kept coming back to something golden to represent the Oscar himself. And then it came to me :

Golden wafers (in the shape of an Olympic ring for bonus points!) to accompany a prawn and basil mousse and a verjuice sauce.

This is what I did :

Golden Verjuice Wafers

80g butter
80g self-raising flour
1/4 cup of verjuice
1 egg white
salt and white pepper

Blend the butter, flour and verjuice together until smooth, mix in the egg white and salt and pepper. Spread thinly on a lined baking sheet in the shapes required. Bake at 180
°c for 8 to 10 minutes or until golden.

Verjuice Sauce

25g butter
2 Tablespoons of verjuice
2 egg yolks
3 Tablespoons of cream
2 Tablespoons of prawn stock (see below)
salt and white pepper

Melt the butter and stir in the verjuice, egg yolks and cream. Cook on a low temperature, stirring well until the sauce starts to thicken. Strain through a fine sieve to remove the egg threads. Return to the heat, add the prawn stock and continue stirring until the sauce is thick and coats the back of a spoon. Season with salt and pepper.

Prawn and Basil Mousse
based on a Stephanie Alexander recipe from the cook's companion.

400g of whole raw prawns
2 egg whites
salt
Kaitaia fire (or tabasco)
100mL cream
Fresh basil leves, chopped

Peel and devein the prawns, reserving the shells and heads for stock if you like. Mince the prawns in a food processor until smooth, saving a few whole for texture later. Add the egg whites, salt and Kaitaia fire and process until stiff and shiny. Chill at this point for at least an hour.
Make prawn stock by covering the shells and heads with water, simmering until the stock is flavourful and the shells are pink. Strain the liquid then poach the reserved prawns in the simmering stock. Roughly chop the prawn meat.
Lightly butter 4 small moulds and fill a pan as a bain marie with water that will come 3/4 of the way up the moulds. Put the bain marie in the oven at
150°c.
Beat the cream into the chilled prawn mixture then mix in the prawn meat and basil. Fill the moulds, pressing down to remove air bubbles, and then cover each with a piece of greaseproof paper. Put the mould in the bain marie and cook for 15 minutes or until firm and a knife inserted comes out clean. Turn out onto a plate, coat with the verjuice sauce and serve with golden verjuice wafers.

These are very rich, a small mousse, sauce and wafer would make a wonderful entree.

Saturday 4 March 2006

fish stock

The fish I bought yesterday is destined to become fish soup. Fish soup needs fish stock, and that is what you see pictured above.

Fish stock is so much quicker to make than a meat stock. All you need is some aromatic vegetables, herbs, some fish bones and to remember not to simmer it for more than twenty minutes. A too-long simmered fish stock will be bitter.

The choice of fish is only governed by what you know about fisheries and their methods and the oiliness of the fish. Choose a white non-oily fish, and you may as well choose one that isn't too expensive. I had bought a whole tarakihi to provide the bones of the stock. Sorry. You can add some prawn shells if you have some from using the prawn meat in a different recipe. Use any aromatic vegetables you like - carrots, onions, fennel or mushrooms. The herbs could be thyme, fennel, bay or parsley.

I make fish stock like this :

500g fish bones, including the head and skin. This was one tarakihi minus its fillets.
1/2 a small carrot, chopped
1/2 a medium onion, chopped
1/2 a medium fennel bulb, chopped
a handful of fennel leaves and stalks
a sprig of thyme

Put all the ingredients in a large pot and pour over one litre of cold water. Bring to the boil then reduce the heat to low and simmer gently for twenty minutes. Strain though a very fine sieve, through muslin if you like, discarding all solids. Leave to cool then refrigerate or freeze.

I am always surprised that boiled up fish heads smell so nice!

Thursday 2 March 2006

fish

I did know at the back of my mind that, of the fish species I can choose to cook for dinner, some are better choices than others ; but I really didn't know which fillet was a better choice for sustainability than the next one. Luckily The Royal Forest and Bird Protection Society of New Zealand does know and has prepared the Best Fish Guide.

The Best Fish Guide lists the fish species available in New Zealand in best choice to worst choice order. Unfortunately no fisheries are actually good choices.

I had bought a selection of fish with which to make a fish soup just before I discovered the guide. I am sad to say that two of the five species I chose were in the Red Worst Choice list : snapper and groper. But the other three were in the Amber Concerns list : trevally, tarakihi and gurnard. I do not think that I will be buying snapper or groper for a long time. It is easy to live without knowing these things but once you find out, and the more you learn, the harder it is to ignore.

Here are links to similar resources around the world, as found on the links page on the Best Fish Guide website :

Australia
Australian Marine Conservation Society's Sustainable Seafood Guide

USA
National Audubon Society's Seafood Lover's Guide
Environmental Defense Seafood Selector
National Environment Trust Chilean Sea Bass Animated Movie
Seafood Info Centre

Britain
UK Marine Conservation Society's Good Fish Guide