If you would like to serve a fairly easy, do ahead, with only a small amount of last minute putting together, first course to a meal, may I suggest grilled goat's cheese salad?
if
Thursday 25 May 2006
Wednesday 24 May 2006
Quail eggs and spic·y salt
Quail's eggs seem so elegant. Small, yet perfectly formed and presented in a beautiful package. I have wanted to serve lightly hard boiled quail's eggs as finger food before a special meal for some time. So I finally did!
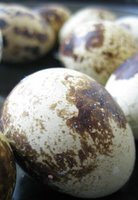
They were simple : simple to cook and simple to serve. But they were slightly tricky to peel and eat. I think that perhaps they are more conducive to sitting around, perhaps outside, killing time with friends, wine and food, rather than as predinner nibbles. You need somewhere to put your glass while you are peeling and somewhere to put the shell before dipping. I know I could have peeled them, but then the beautiful shells would have been lost. However, I am dying to make mini-scotch eggs with them soon!
We boiled the quail eggs for 2 minutes and served them with a spicy salt made by dry frying some left over curry spice mix until fragrant and mixing with some salt.
Monday 22 May 2006
fei·jo·a
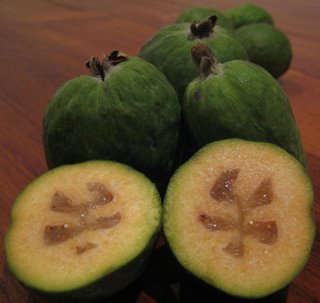
Sadly, the feijoa season is all but over. My favourite fruit. Something of which I have a hard time enjoying just one, I always think a pile of them do the wonderful flavour more justice.
Like vegemite, there is no middle ground with feijoas, you either love or hate the flavour. To me feijoas are a completely unique flavour, but I have heard them described as banana-like but with a citrus flavour. A friend of mine describes them as tasting like iron ; which I like to hear because it means that I get presents of huge boxes of feijoas from her several dozen trees!
My mother makes feijoa chutney, several people I know make feijoa jam, stewed feijoas feature in pies and sauces, and a friend of mine is about to bottle his home made feijoa cider. But the only thing I can ever bring myself to do with this fruit is to eat them raw, by themselves, scooping the flesh from the skin of each half with a spoon. So delicious.
I wonder if feijoas are as popular outside New Zealand? Are they treasured in their native land, South America? How are they treated in our biggest export market, America?
Friday 19 May 2006
black beans and ries·ling
This was not what I had planned for the Fabulous Favorites Festival but it came together as a fabulous favourite nonetheless! I was planning to describe a fantastic salmon feast with a specially chosen bottle of de Lapeyre Jurancon Sec, but when the happy accident described below came together it seemed more fitting.
The concept of the Fabulous Favorites Festival as hosted by Lenn and Alberto is to combine Is My Blog Burning and Wine Blogging Wednesday by either picking a favorite bottle of wine from your cellar and create/cook a dish that goes with it or picking a favorite dish in your culinary repertoire and seek out a wine that will pair will it.
I picked a favourite dish and choose a wine to accompany it.
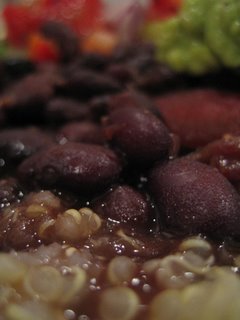
Black bean chilli. I really love black bean chilli. One of the stand by meals that I look forward to, secretly hoping that there might not be anything else planned for dinner and that we have to have [yay!] black bean chilli.
There are as many ways to serve black bean chilli as there are to make it. If you have made it quite liquid then it is good with rice, or if it is thicker you can wrap it in a tortilla. It can be the filling for a pie, the topping for a snack, so many things. Then there are the accompaniments - guacamole, salsa, cheese, sour cream, the list goes on.
So imagine my pleasure when I decided to pick a bottle of wine to accompany the black bean chilli and came up with a winner. A wine that accentuated the hotness of the chilli (sweet), kept up with the flavours in the chilli and guacamole (had a definite character), yet slightly acidic that went beautifully with the fatness of the guacamole and the sour cream.
Waimea Classic Riesling 2003 from Nelson. I had not tried this wine before. Neither had I purposely chosen a wine to serve with black bean chilli before now. I was rather pleased with myself, definitely one to go in the book!
Black bean chilli
not really a recipe, more a guideline!
Soak some black beans overnight. The next day drain, rinse and put in a pot with enough stock or water to cover by an inch. Add a couple of bay leaves and while dried chillis. Bring to the boil then turn down to a simmer and cook until tender.
Meanwhile, slowly fry some onions, garlic, chilli and cumin until sticky and golden.
Add the beans to the onion mixture, reserving some of the liquid if you think there is too much. Bring to a simmer and adjust the seasoning.
Serve immediately or for a better flavour, leave to cool overnight and reheat to serve the next day, adjusting the seasoning once again. Serve on rice or quinoa (as in the photo above) with guacamole, salsa and sour cream.
Remember to make enough so you can pop a couple of servings in the freezer for a happy midweek unplanned dinner. And serve with a classic Riesling!
Wednesday 17 May 2006
chest·nut and len·til soup
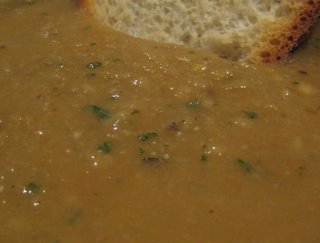
It is getting cold here now. The last couple of days have certainly been wintery. Just the weather for a lovely, thick and wonderfully tasty soup. Soup to put in a bowl to wrap your hands around. Makes winter something to welcome.
I am really enjoying lentils and pulses at the moment, a phase perhaps, but a good one. So with the thought of lentils in my mind and the image of a bag of chestnuts before me the perfect soup to make had to be chestnut and lentil.
Chestnuts really give a soup a richness that is hard to beat. The only problem is the peeling of that furry skin within the shell that makes your teeth feel funny if you decide that is close enough while you are peeling. The peeling of chestnuts is not something I can [now] recommend for a whole dish. They are fine, and even fun, to peel as you eat them roasted and dipped lightly in salt. This way you can take your time and know that the reward for your patience and exactness will very shortly be the reward of a delicious roasted chestnut kernel. But for a whole dish of soup your fingers will be sore well before you have finished the pile. I am yet to experiment but I think perhaps this is the time for canned unsweetened chestnut puree, or frozen chestnut crumbs. But then again it could be a labour of love for a small batch just enough for two . . .
I made the soup like this, which was incredibly good ; a great benchmark for experiments with pre-prepared chestnuts :
Lentil and chestnut soup
enough for 4 good portions
450g whole chestnuts, roasted as per this post, and peeled of shell (AND furry inner skin!), chopped
1 cup of red lentils, rinsed
1 litre of water
1 onion, finely chopped
1 stalk of celery, peeled and finely diced
1 carrot, peeled and finely diced
2 cloves of garlic, finely chopped
2 bay leaves
some parsley stalks
olive oil
fresh chopped herbs, such as parsley, marjoram, thyme
a good pinch of fennel seeds, lightly crushed
1/2 cup dry sherry or wine
1 tablespoon tomato paste
Put the lentils to cook with the water, onion, celery, carrot, garlic, bay and parsley stalks. Add more water as they cook if you think it is getting a bit dry, we want a soupy texture, but not too liquid. When they are almost cooked heat a soup pan with a bit of olive oil and sauté the chestnuts and herbs for a few minutes. Deglaze with the wine and add the tomato paste. Remove the bay leaves and parsley stalks from the now cooked lentils and add lentils, vegetables and their liquid to the chestnuts. Simmer briefly then purée to your preferred consistency, either in a blender or with a stick blender. Season to taste with salt and pepper and bring back to the boil. Serve piping hot, with toast if you like.
Monday 15 May 2006
seared salm·on
My friend Helen, who lives in Twizel, made my day on Wednesday when she called to tell me that some salmon would be winging its way to me in Wellington that evening. This salmon was so fresh that at the time Helen called me the fish would have still been swimming.
Twizel is important to a salmon eater because there exist several canals in which the salmon can swim. These canals carry water between lakes Tekapo, Pukaki and Ohau and Benmore. Intensively farmed salmon does not have to exercise, because the water is generally not moving ; however the Twizel salmon have to swim against a fast moving current. Intensively farmed salmon are identifiable in many ways, but perhaps the most obvious is the disproportionately large body to the head, due to fast and easy fattening.
The salmon I received was amazingly fresh, without much visible fat, and actually a lot thinner that other fillets I have had. I wanted to eat this salmon very plainly, and enjoy every mouthful just as salmon.
First of all I cut some slices from the tail end as thinly as I could to eat as sashimi. All we needed was a spot of wasabi, some soy sauce, and a wee pile of finely grated daikon to eat between mouthfuls of salmon. This was amazing, just pure soft, melting salmon. Delicious.
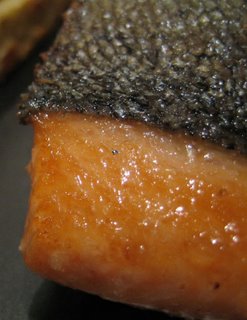
Then the main course - my favourite way to prepare salmon. Oven seared. Lightly seasoned, and cooked hot and quick. No mucking around.
I seared the salmon like this :
Put a heavy pan, I use my cast iron frying pan, in the oven and preheat to the highest temperature - 250°c for my oven.
Rinse and dry the salmon steaks and season lightly on both sides with salt and cayenne.
When the oven and pan are good and hot, lay the salmon in the pan skin side down, cook for 4 minutes. Turn the salmon over and cook for another 4 minutes.
Serve with lightly cooked greens for a delicious and healthful meal.
Some notes : The salmon will release some fat as it cooks which can spit as you turn the salmon over - be careful. Adjust the cooking times according to the thickness of the fillet and how you like your fish cooked. These times will give a good crust but leave the middle quite moist. I also like to leave the pan in the oven for say 20 minutes once it gets to temperature to ensure the pan is as hot as possible. Oh, and put the pan in the oven before you heat it up so a cold pan does not get shocked by a very hot oven - appently this can cause cast iron pans to crack.
Wednesday 10 May 2006
blue·ber·ry muf·fins
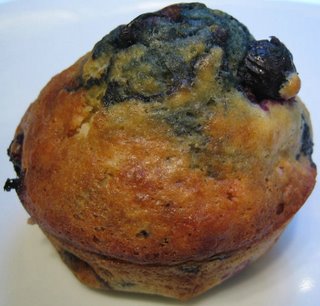
Of all the muffin flavours, blueberry has to be the classic. Cake-like, certainly, but not cake. The tartness of the blueberries offset the sugar in the batter.
My lovely sister and her family gave me a blueberry tree/bush for my birthday in January with the promise that it would fruit twice a year - once around Easter and once toward the end of the year. Well, what-do-you-know, it did fruit around Easter and last weekend we picked the blueberries. This lovely bush/tree gave us 8 blueberries for its first fruiting - isn't that marvelous!?
I would be lying if I said that I had made a batch of blueberry muffins with these berries. They would have been quite small and with not many blueberries to go around - rather like those ones you get cheap at the supermarket when you wonder if you accidently picked a cupcake. No, these, our first blueberries were eaten and savoured just by themselves. But they certainly put me in the mood to make some blueberry muffins!
Blueberry muffins
makes 6
40g butter, melted and allowed to cool
100g plain flour
1/4 teaspoon baking soda
1 teaspoon baking powder
40g sugar
pinch of salt
1 small egg
100mL buttermilk
100g blueberries
Mix the dry ingredients together. Separately, beat the butter, egg, and buttermilk. Gently and cautiously (muffin batter should not be over worked), mix the wet ingredients into the dry until pretty much combined, then stir in the blueberries. Spoon into lined muffin tins. Bake at 200°c for 20 minutes.
Monday 8 May 2006
lav·en·der mi·so mar·i·nat·ed chick·peas
I have been looking forward to the next installment of Paper Chef and I was very pleased when Kevin of Seriously Good announced the 17th edition of the ever popular online event Paper Chef.
The ingredients for this round are chickpeas, lavender, miso and "something local".
I had some chickpeas soaking in anticipation of a marinated antipasto style salad. Naturally enough I knew I had to convert the intended garlic-lemon-ginger marinade into something involving lavender and miso - but what about the local ingredient?
Well, you might have noticed that I have been getting into gardening . . . so imagine how great it felt to decide that the local ingredient was going to have been grown less than 10 meters from my front door. Yes! The spring onions were ready to be pulled. And so that is what I did to complete the challenge of a local ingredient.
I made the chickpeas like this :
Lavender miso marinated chickpeas with local spring onions
1 cup of dried chickpeas
1 teaspoon of miso paste
juice of a lemon
2 tablespoons of olive oil
a good pinch of lavender*
salt and pepper
spring onions
Soak the chickpeas in plenty of water and a pinch of baking soda for at least 24 hours. Drain, rinse and simmer in fresh water for approximately and hour and a half or until tender.
Blend the miso with the lemon juice, olive oil, lavender and salt and pepper to taste.
Drain the chickpeas and while still warm mix with the dressing. Slice the spring onions finely and mix into the chickpeas. Leave for at least 24 hours to marinate ; the longer the better. Serve as part of an antipasto platter or as a salad to begin a meal.
*I used organic culinary lavender from Lavender Impressions which was grown in Levin. Levin is less than 100 miles from Wellington so the lavender is local too!
Friday 5 May 2006
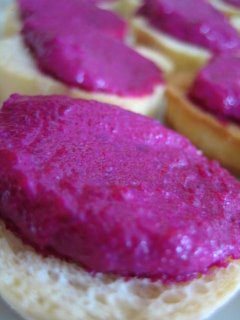
beet·root horse·rad·ish dip
This is a very special recipe to me. Not because it is ground breakingly new, very clever or difficult. It is special because I feel like the mother of this dish. I had a hand in [almost] each component. Might sound silly, but all of you who have started on the continuum of gardening, stepped on the path of bread-making, entered into the world of bacterial fermentation, you will understand.
To put it another way, I quote Neil of the Young Ones :
"First we sow the seed, nature grows the seed and then we eat the seed."
He knows what I mean.
The ingredients are :
beetroot - grown in my small urban garden, harvested and put in the oven to roast within about 10 minutes.
horseradish - grown in my small urban garden, pulled out, peeled and grated within about an hour.
yoghurt - made the day before from the seed of a batch I have had for a long time.
salt - from the South Island, but I do not know when harvested.
pepper - indigenous to Java (not so far away), grown and harvested I do not know.
The dip was made like this :
beetroot and horseradish dip
beetroot
horseradish root
yoghurt
salt and pepper
Wash the beetroot, and trim the leaves making sure not to pierce the skin. Wrap loosely in foil and bake at 180°c for 45 minutes to an hour or until the beetroot is tender.
Leave until cool enough to handle then peel off the skins.
Put the beetroot through a mouli or blend.
Peel and grate horseradish to your taste - the fresher, the less you will need ; jarred may be substituted if necessary.
Stir in enough yoghurt to make the consistency required.
Season to taste with salt and pepper.
Serve with crudités, create a canapé or spread on bread for wonderful hors d'oeuvre.
Wednesday 3 May 2006
corn frit·ters
Corn Fritters : an easy lunch, a quick brunch, a great breakfast, something good to turn left over chilli or beans into a complete and special meal.
pro·sciut·to fig and sage wraps
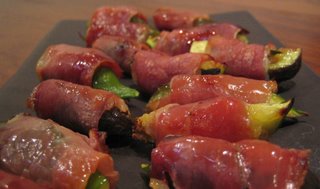
Finger food - oh yes, I do like finger food. Something that is easy to eat while doing at least two other things - drinking and talking, and at times, listening too.
I think perhaps proscuitto is the omnivore hors d'oeuvre maker's best friend. Is there much that does not benefit, in the finger food arena, from being wrapped in proscuitto? Fruit, cheese, fish, vegetables, bread or indeed just proscuitto all by itself.
Proscuitto is air dried ham - a specific, well known type is Parma ham, being from Parma, Italy. Many countries make a form of raw air dried ham, with perhaps Italy the most celebrated. It takes a long time to turn crude pork into proscuitto ; first the washing, then the salting, then the rising and the drying. There are no synthetic chemicals involved in the production of proscuitto , just salt, air and time. Proscuitto is most often sold in very thin slices with pure white fat streaking down the side of each slice.
The combination of fig and sage wrapped in proscuitto was not difficult, but was a new one for me. It is hard to be specific in the quantities, but rest assured that any left over proscuitto will not go to waste (see above).
I made the proscuitto fig and sage wraps like this :
proscuitto, fig and sage wraps
Fresh figs, quartered
A small sage leaf per fig quarter
Proscuitto strips
Lay a sage leaf on each fig quarter and wrap with a strip of proscuitto. The amount of each ingredient is only dependant on your taste. Place on a grill pan seam side down.
Grill for about 10 minutes or until the proscuitto is crisping and turning brown and delicious. Turn over part way through. The figs will become wonderfully sticky, sweet and caramelised - just perfect with the salty-savoury proscuitto.
Serve immediately.
Monday 1 May 2006
chick·en stock cubes
When you have saved your pennies and bought a free range organic, slowly and naturally reared, and properly raised chicken you will want to use every bit of the treat that a chicken has once more become.
As I did for pheasant, I like to use all of a roast chicken with the final product, if you like, being stock. A properly raised chicken has good bones which are full of the goodness of which an intensivly farmed battery chicken can only dream. This goodness is never more obvious than in a stock made from good strong bones. The goodness is amazing - flavourful golden jellied stock.
For convenience sake as well as to take advantage of the analogy that is begging to be made, I like to reduce the stock to concentrate the liquid then freeze it in icecube trays. Easy then, to throw a couple of chicken stock cubes into the pot when the recipe calls for it.
Chicken stock cubes
Break the carcass from a roast chicken into a few smaller pieces and pack into a pot and just cover with cold water. Add flavourings such as whole black peppercorns, half an onion, a stick of celery, a carrot if you want. I don't think it is strictly necessary to add flavourings at this stage especially if the bird was seasoned before it was roasted and you want to end up with a fairly neutral stock. Bring the contents of the pot slowly to simmering point then leave to simmer gently for a couple of hours. Strain the liquid from the solids which can now be discarded. Rinse out the pot and return the liquid. Bring to the boil and reduce by about half. Leave to cool, then strain through muslin and chill in the fridge so the fat rises and solidifies and can easily be removed. Spoon the now jellied stock into ice cube trays and freeze.
Some notes :
This is neither an orthodox nor strict method of making stock, but it is easy and produces a tasty result. The stock will not be crystal clear as a stock can be if it is skimmed and made from a raw chicken.
If you like you can save up carcasses in the freezer to make a larger amount at a time. The stock can be made by covering the still frozen carcasses with water and carrying on from there.
It is not necessary to reduce the stock but it means that it takes up less room in the freezer and the cubes will taste more concentrated.
Subscribe to:
Posts (Atom)